Bypass geo-blocked content! and stay safe & annonymus online.
If you're blocked from viewing content based on your location, consider using a VPN to unblock it. A VPN is a service that switches your online identity with another one so that you appear online as if you're from another geographical location.
Check out NordVPNPut all your favourites bits of all your favourites addons into one easy to use addon.
Description
Super Favourites is a better way of managing your Kodi Favourites. Virtually any menu item within Kodi can be added to Super Favourites, even from addons that don't normally provide this feature. Super Favourites allows you to better manage your Kodi favourites, including the creation of sub-folders, into which your Kodi favourites can then be copied or moved into. This allows you to create you own custom addon with just the best bits of your favourite addons. Search your favourite addons, play your favourite music, read your favourite comic strips, select your favourite playlists, browse your favourite movies, listen to your favourite radio stations, watch your favourite cartoons, the possibilities are endless, all from within one easy to use addon.
News
1.0.59: 29th May 2017 - 'Now playing' text now defined by SF due to skin variations
How To Install
Direct installation
Via Repository
Via Directory
- Download the addon.
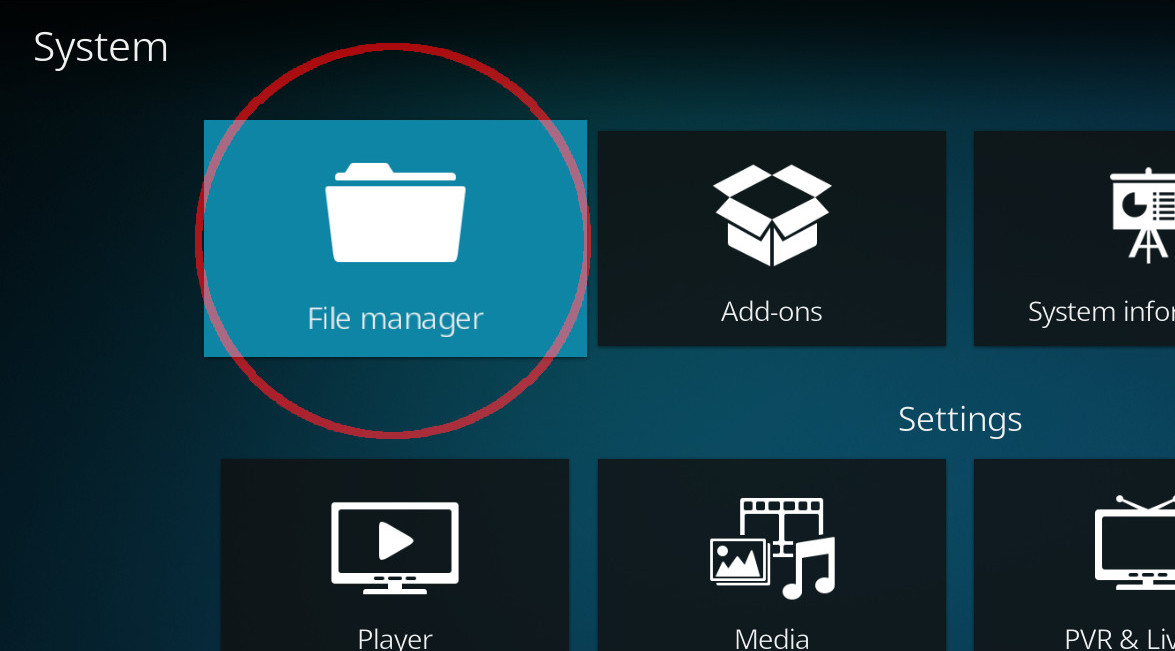
- Open up Kodi and navigate into Add-ons.

- Click the open box icon (above the side-menu).
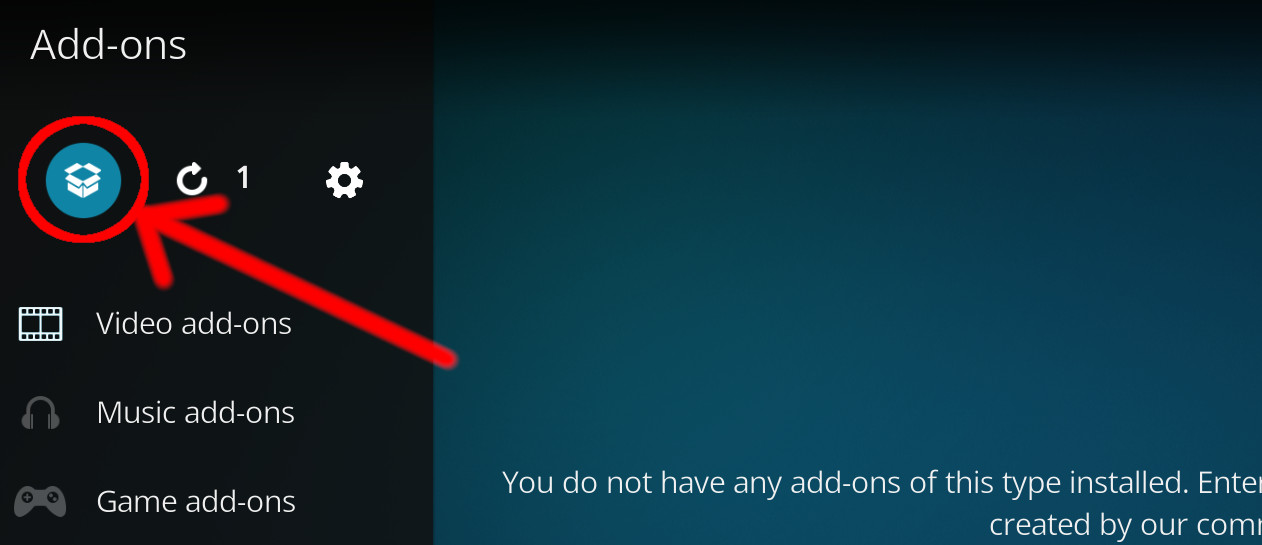
- Select Install from zip file.
- If this is the first addon you install, Kodi will warn you about installing addons from "unknown sources" for security reasons - it's your call.
- In any case, Kodi will warn you, you may not get auto-updates for this addon.
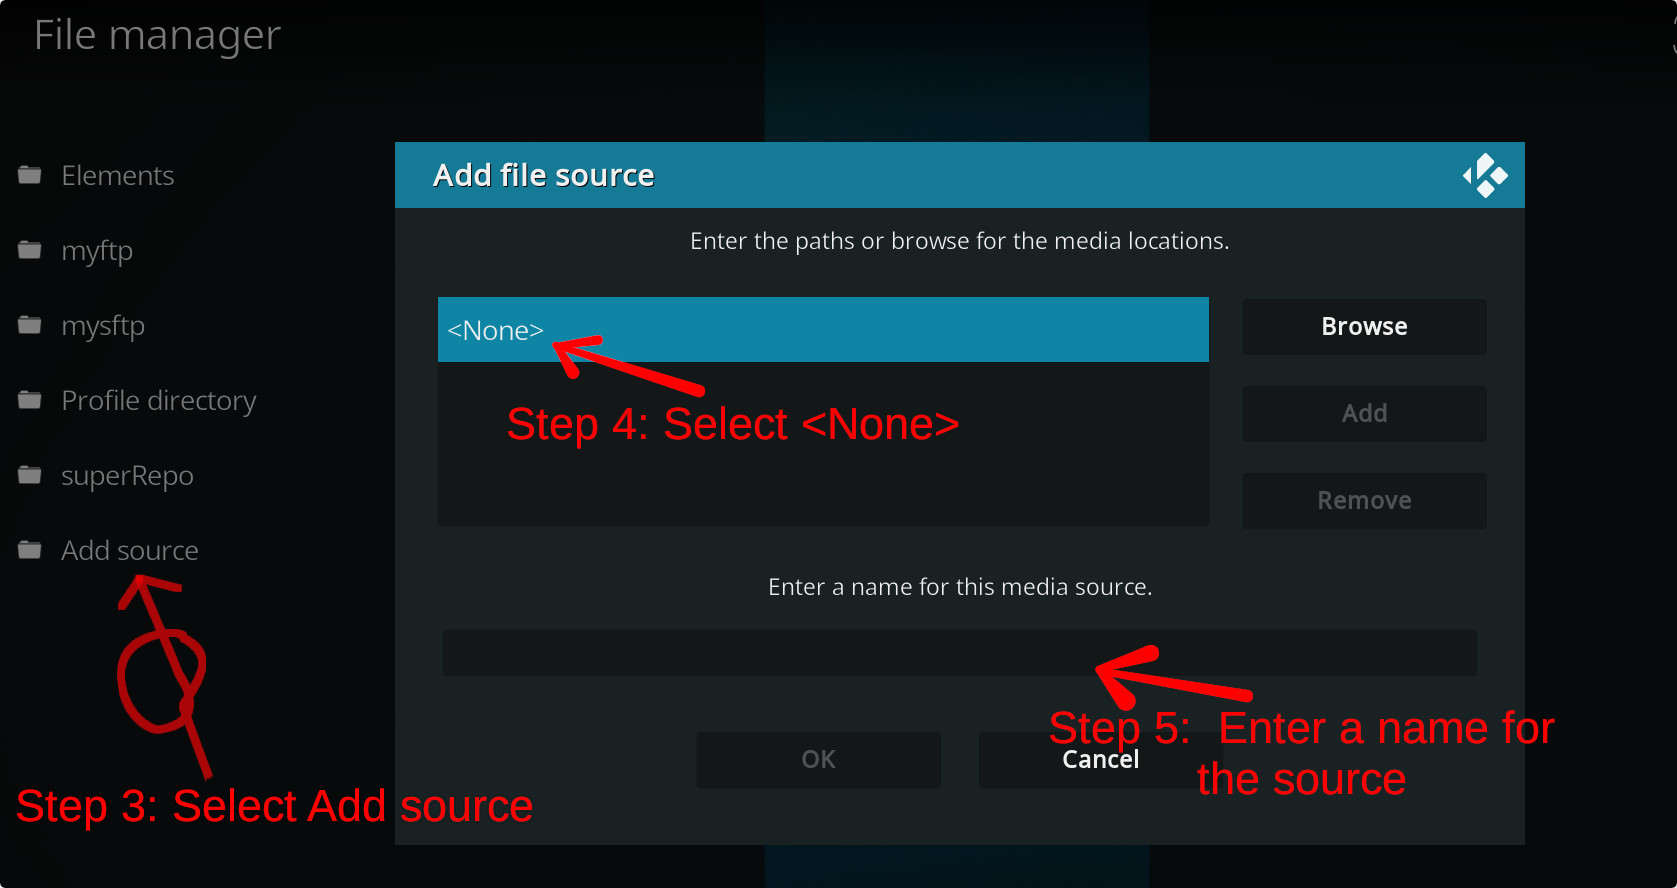
- Navigate into the location where you've downloaded the addon to and select it to Install.
For a full installation guide please click here.
Additional Information
| Updated: | March 21, 2023 |
In Repositories: | |
| Platform: | all |
Alternative Sources: | Download 1Download 2Download 3Download 4Download 5Download 6Download 7Download 8Download 9Download 10Download 11 |
| License: | GNU GENERAL PUBLIC LICENSE. Version 2, June 1991 |
Depends On: |