Help other people decide, vote up or down?
livestreamspro- shamelessly forked from livestreams but added many things
Description
In addition to what livestreams allowed you to do, you can now,
1. call regex in regex,
2. multiple regex in page, regex in session, also htmlunescape responses
3. create session from one regex and pass onto next in line
4. save sessions to a file and open again later
5. write python code in .py file, put in the profile directory and then call from your regex.
6. use epoctime, guid and unpack as functions already defined.
7. Use it to post values to the pages to get the proper responses
8. support many headers, like origin, X-Requested-With
9. you can now append cookies in response and then read in regex using includeheaders
10. You can now link to another web url via your xml using externallink
11. support for google captcha, now you can show and then post the text
View More ↓
How To Install
Direct installation
Via Repository
Via Directory
- Download the addon.
- Open up Kodi and navigate into Add-ons.

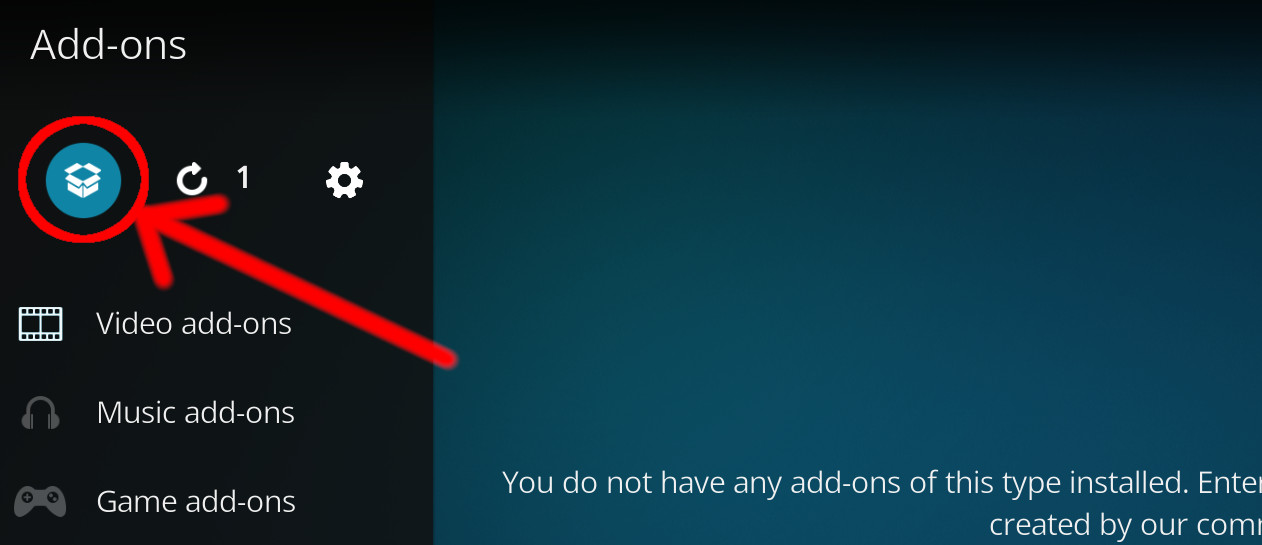
- Click the open box icon (above the side-menu).

- Select Install from zip file.
- If this is the first addon you install, Kodi will warn you about installing addons from "unknown sources" for security reasons - it's your call.
- In any case, Kodi will warn you, you may not get auto-updates for this addon.
- Navigate into the location where you've downloaded the addon to and select it to Install.
- First make sure you have the repository installed
- Open up Kodi and navigate into Add-ons.

- Click the open box icon (above the side-menu).

- Select Install from repository.
- If you have at least one repository (besides the default) installed:
Select the repository you wish to install from.
- Select the category the addon belongs to, in this case it should be video.
- Select LiveStreamsPro.
- Click Install.
Installing via directory means you connect to a Web server directly using Kodi.
It also means that the addon is found under a repositry or a sub-repository you install from that directory (check out which repositories host
LiveStreamsPro addon
below).
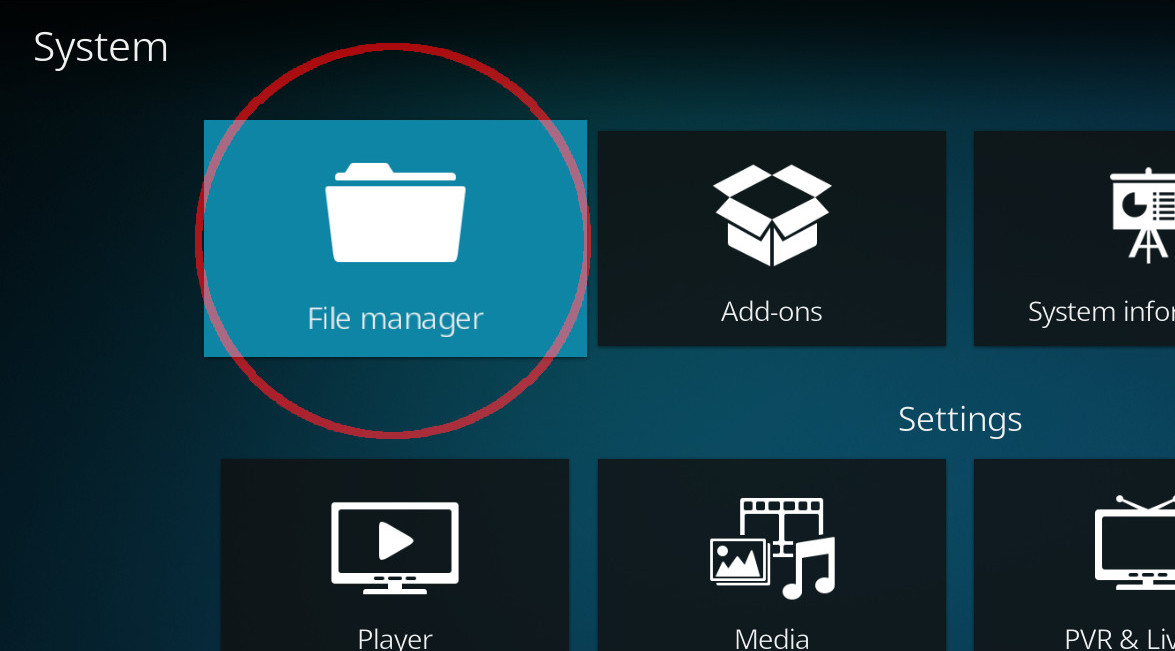
- Open up Kodi and navigate into the System settings screen by selecting the cogwheel button (above the side-menu inside Kodi's home-screen).
- Select File manager.

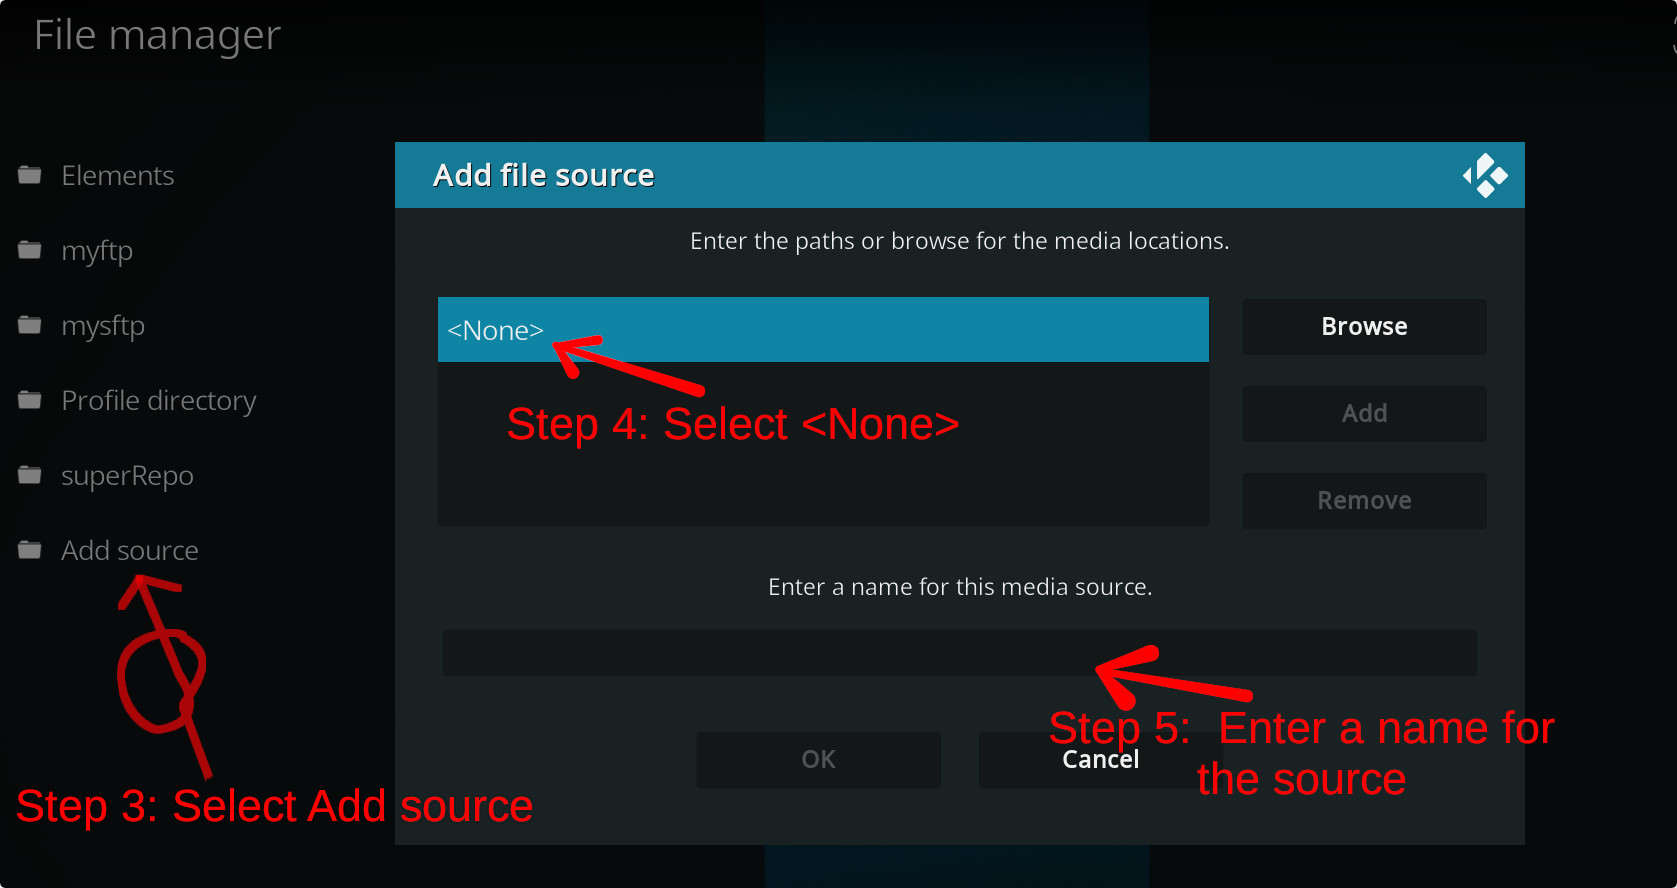
- Select Add source from the left pane (the right pane is in case you want to move files from one folder to another, if you're using a mouse you may need to double click it).
- Click the line where it says <None> and enter the following url:
https://mrgsi.github.io/gsource/
Note: some servers may be case-sensitive.

click OK after you are done typing. - Below that, if there isn't already, enter a name for the source which will be easy for you to recognize in the future. Click OK
- Now press the return button twice to return to home-screen.
Navigate into Add-ons.

- Click the open box icon (above the side-menu).

- Select Install from zip file.
- If this is the first addon you install, Kodi will warn you about installing addons from "unknown sources" for security reasons - it's your call.
- In any case, Kodi will warn you, you may not get auto-updates for this addon.
- Look for the name of the source as it was entered in step 5, select the repository zip file you see inside it.
That's it. The rest of the instructions are as detailed in installing Via Repository, use the repository you've just installed.
For a full installation guide please click here.
Additional Information
WebsiteForumSource


