
premiumizer Cloud Addon
Description
Premiumize Cloud Addon with a twist! This addon is inteded for use with content that you currently own! The author does not host or distribute any of the content displayed by this addon. The author does not have any affiliation with the content provider.
News
2023.01.24 - Merged pushes from Peno64 - thanks fro the fixes 2022.01.16 - Changed call translatePath from xbmc to xbmcvfs. Still works on kodi matrix but now also on nexus 2021.04.23 - Updated Addon to Python 3, compatible to Kodi 19 2019.02.17 - Switched to Oauth Authorization 2019.02.09 - Added sort options for Trakt Lists 2019.02.06 - (SETTINGS) Added ability to see and play non video files. 2018.11.28 - Hotfixes and changed NextUp skin 2018.08.06 - Fixed missing tv shows seasons while browsing content 2018.08.05 - Fixed Playback Issues 2018.07.10 - Improved post playback routines and checks 2018.05.10 - User Requests: Transcoded option for playback - Show Only Video Files 2018.05.10 - Added Delete Items after Watched + autodelete setting, Added Autoplay under Scraper Settings 2018.04.21 - Library now match your cloud folders and files structures. Selective sync updated and improved to reflect changes 2018.04.17 - Rewrote Cloud Sync to Library. Now is a selective Mode instead of a full Cloud Copy. Some improvements in handling files. 2018.04.13 - Code improvements. Improved library sync all around 2018.03.26 - Scraper Recursive Folders 2018.03.25 - Added Library Sync 2018.03.06 - Recursive Metadata in Cloud Folders and improved overall 2018.01.22 - User Request. Added Filesize to files 2018.01.14 - Improved code and title matching. Added TV Shows metadata in cloud sections(need to be enabled in the settings) 2018.01.12 - Improved title matching and playback. Overall cleanup 2018.01.12 - Fixed Playback Issues and some code cleanup. Better Title matching in Cloud Section 2018.01.11 - Added Meta to Movies in Cloud Section if title starts with the format "TITLE (YEAR)" i.e: Dunkirk (2017) 2018.01.08 - Added Rename - Match in Browse Lists and some additional cleanups 2018.01.05.3 - Added Download Features and tweaked lists 2018.01.05 - Improved results and transfer functions 2018.01.04 - Initial Release
How To Install
Direct installation
Via Repository
Via Directory
- Download the addon.
- Open up Kodi and navigate into Add-ons.

- Click the open box icon (above the side-menu).
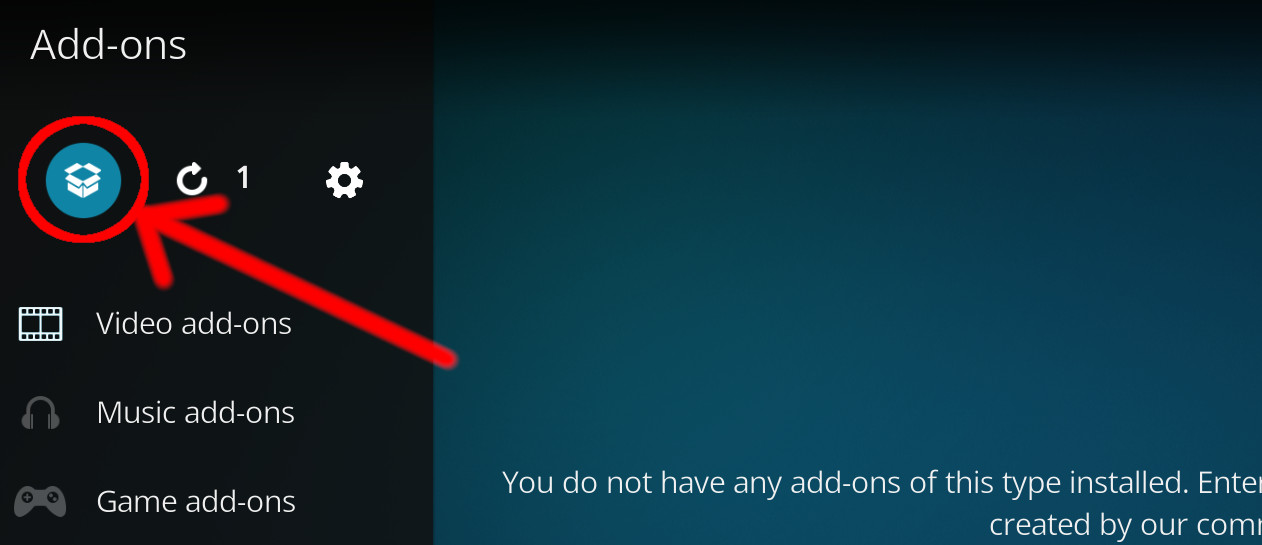
- Select Install from zip file.
- If this is the first addon you install, Kodi will warn you about installing addons from "unknown sources" for security reasons - it's your call.
- In any case, Kodi will warn you, you may not get auto-updates for this addon.
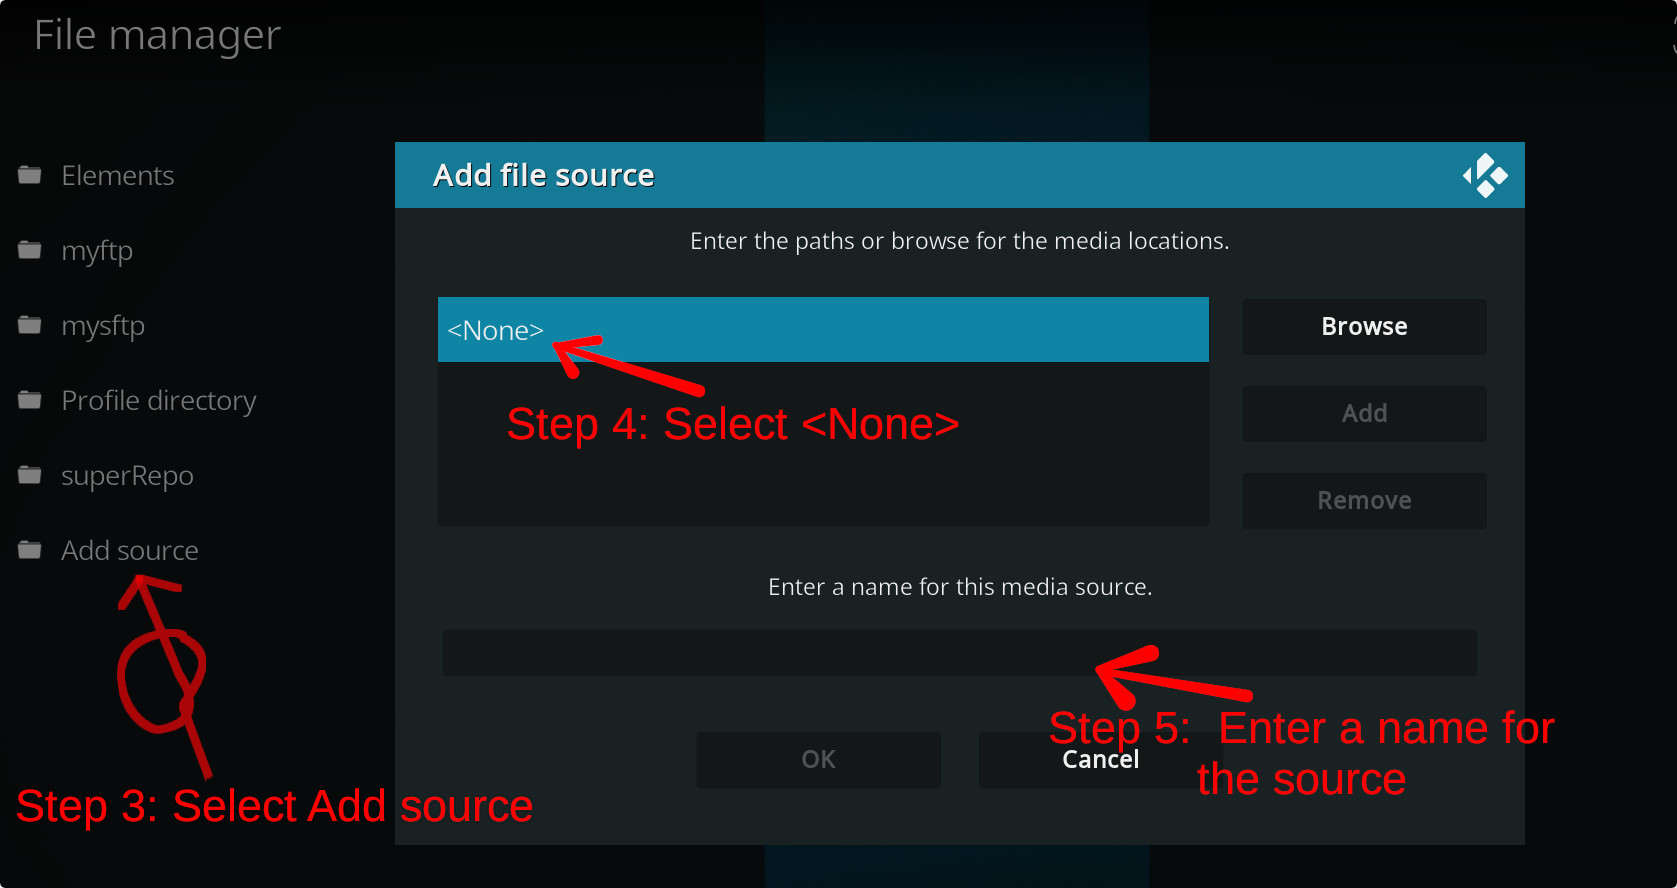
- Navigate into the location where you've downloaded the addon to and select it to Install.
For a full installation guide please click here.
Additional Information
| Updated: | January 25, 2023 |
In Repositories: | |
| Platform: | all |
Alternative Sources: | Download 1 |
| License: | Not specified |
Depends On: |