PyAMF provides Action Message Format (AMF) support for Python that is compatible with the Adobe Flash Player.
Description
The Adobe Integrated Runtime and Adobe Flash Player use AMF to communicate between an application and a remote server. AMF encodes remote procedure calls (RPC) into a compact binary representation that can be transferred over HTTP/HTTPS or the RTMP/RTMPS protocol. Objects and data values are serialized into this binary format, which increases performance, allowing applications to load data up to 10 times faster than with text-based formats such as XML or SOAP. AMF3, the default serialization for ActionScript 3.0, provides various advantages over AMF0, which is used for ActionScript 1.0 and 2.0. AMF3 sends data over the network more efficiently than AMF0. AMF3 supports sending int and uint objects as integers and supports data types that are available only in ActionScript 3.0, such as ByteArray, ArrayCollection, ObjectProxy and IExternalizable.
How To Install
Direct installation
Via Repository
Via Directory
- Download the addon.
- Open up Kodi and navigate into Add-ons.

- Click the open box icon (above the side-menu).
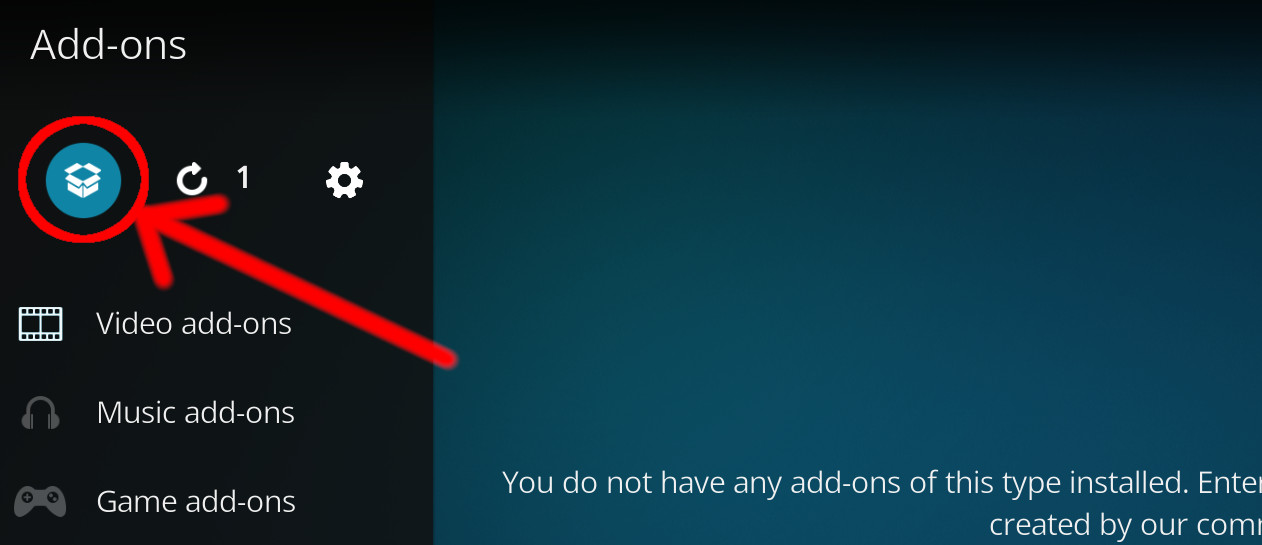
- Select Install from zip file.
- If this is the first addon you install, Kodi will warn you about installing addons from "unknown sources" for security reasons - it's your call.
- In any case, Kodi will warn you, you may not get auto-updates for this addon.
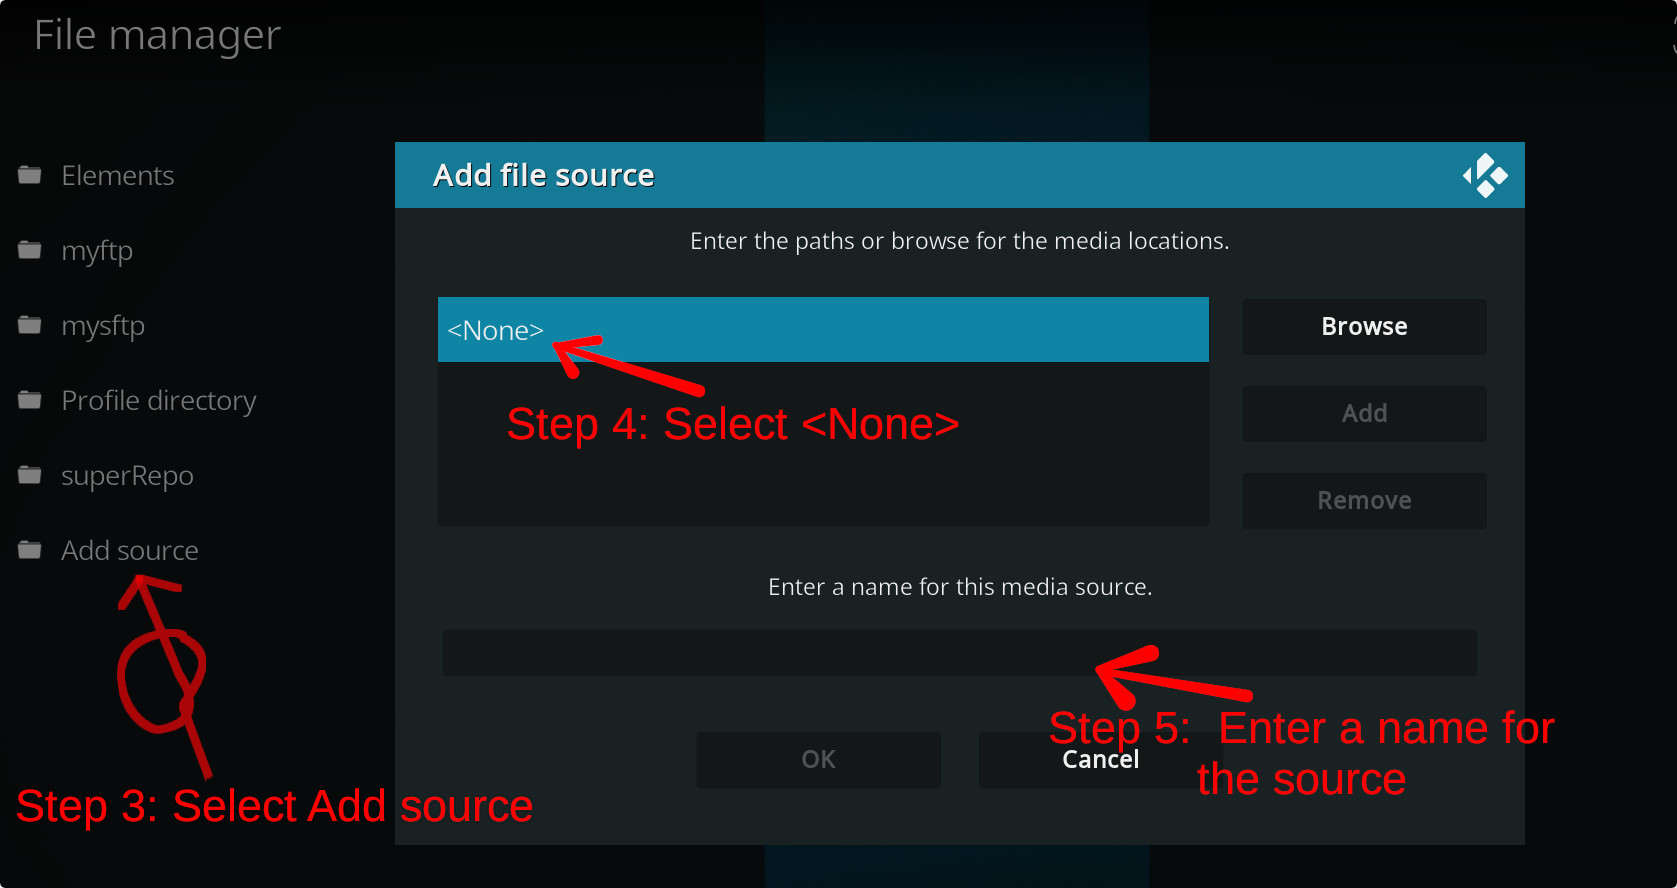
- Navigate into the location where you've downloaded the addon to and select it to Install.
For a full installation guide please click here.
Additional Information
| Updated: | June 29, 2022 |
In Repositories: |
|
| Platform: | all |
Alternative Sources: | Download 1Download 2Download 3Download 4Download 5Download 6Download 7Download 8Download 9Download 10Download 11Download 12Download 13Download 14 |
| License: | MIT |
Depends On: |