
Protect your Privacy! use a VPN to download & surf annonymusly.
Identifying data, such as your IP: 18.118.144.97, is visible when you surf the Net. When using a VPN, your data is being switched by that of the VPN and not even your ISP can tell where you surfed.
Better safe than sorry...
Aeon MQ 7, improved, more light and more powerful than ever.
Description
The traditional Aeon MQ reaches its seventh edition. Reformulated, very simple to use, with a new code that provides a lightweight and powerful skin. The Aeon MQ 7 incorporates new features such as REPLACE which takes the main menu's level of customization to something never seen before. Aeon MQ 7, you've never seen a skin like this.
News
v1.0.1.8 - Release date: August 3, 2019 ADDITIONS • I changed the code to display the progress bar and percentage info when cleaning your library. Thanks to shedrock for the request and Wanilton for the assist! • I added the mini weather from MQ 8 to MQ 7 per shedrock's request. You can enable/disable this from Skin Settings > Main Menu. • I added code to display the percentage played even when a file has been marked as watched. Thanks to shedrock for the request! • I added code to display the actress images from the Actress Artwork Add-on by chrissix. This will display actress images on your Video Info page as well as the RightList and Shelf3D View. I'll add to other views as time permits. Read the Add-on's thread for more info. Thanks to chrissix for the Add-on and his hard work on the code! • I added another weather code (hazy/day) to the sunny weather animation. • I added code to display Dutch MPAA ratings. You can display seven different flags by entering the following text for your MPAA Rating...NL-AL, NL-MG6, NL-6, NL-9, NL-12, NL-16, NL-18. Thanks to MB1968 for the request! • I added an image to the round language media flags for Japanese language. Thanks to Kupo91 for reporting the missing flag! • I added a setting to the Top Menu named "UP NEXT ART" under "VIEW OPTIONS/CHANGE VIEW". This will allow you to choose which artwork is displayed for the Up Next Add-on. The setting has three options...LANDSCAPE, FANART and THUMB. Thanks to nomnom27 for the request! FIXES • I fixed the rating info for music widgets. • I fixed the spelling of a word in resource.language.de_de. Thanks to zooz for reporting the bug! • I changed the code in SettingsSystemInfo.xml to display the Hardware info better when you go to System > System Info > Hardware. Thanks to zooz for reporting the bug and providing the fix!
How To Install
Direct installation
Via Repository
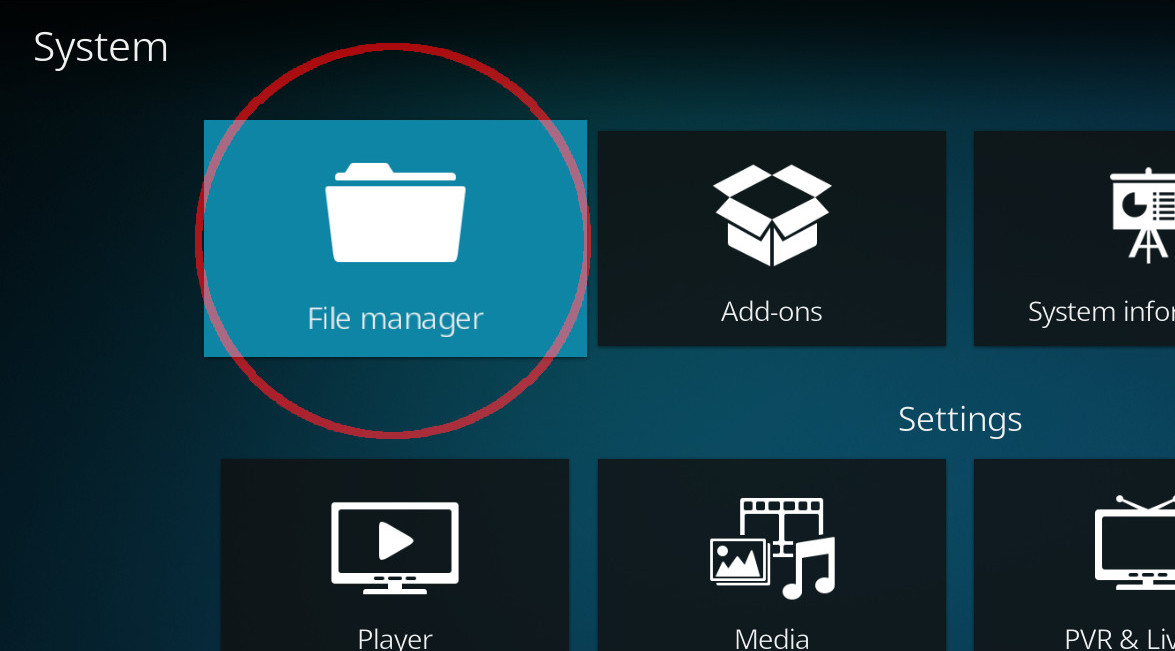
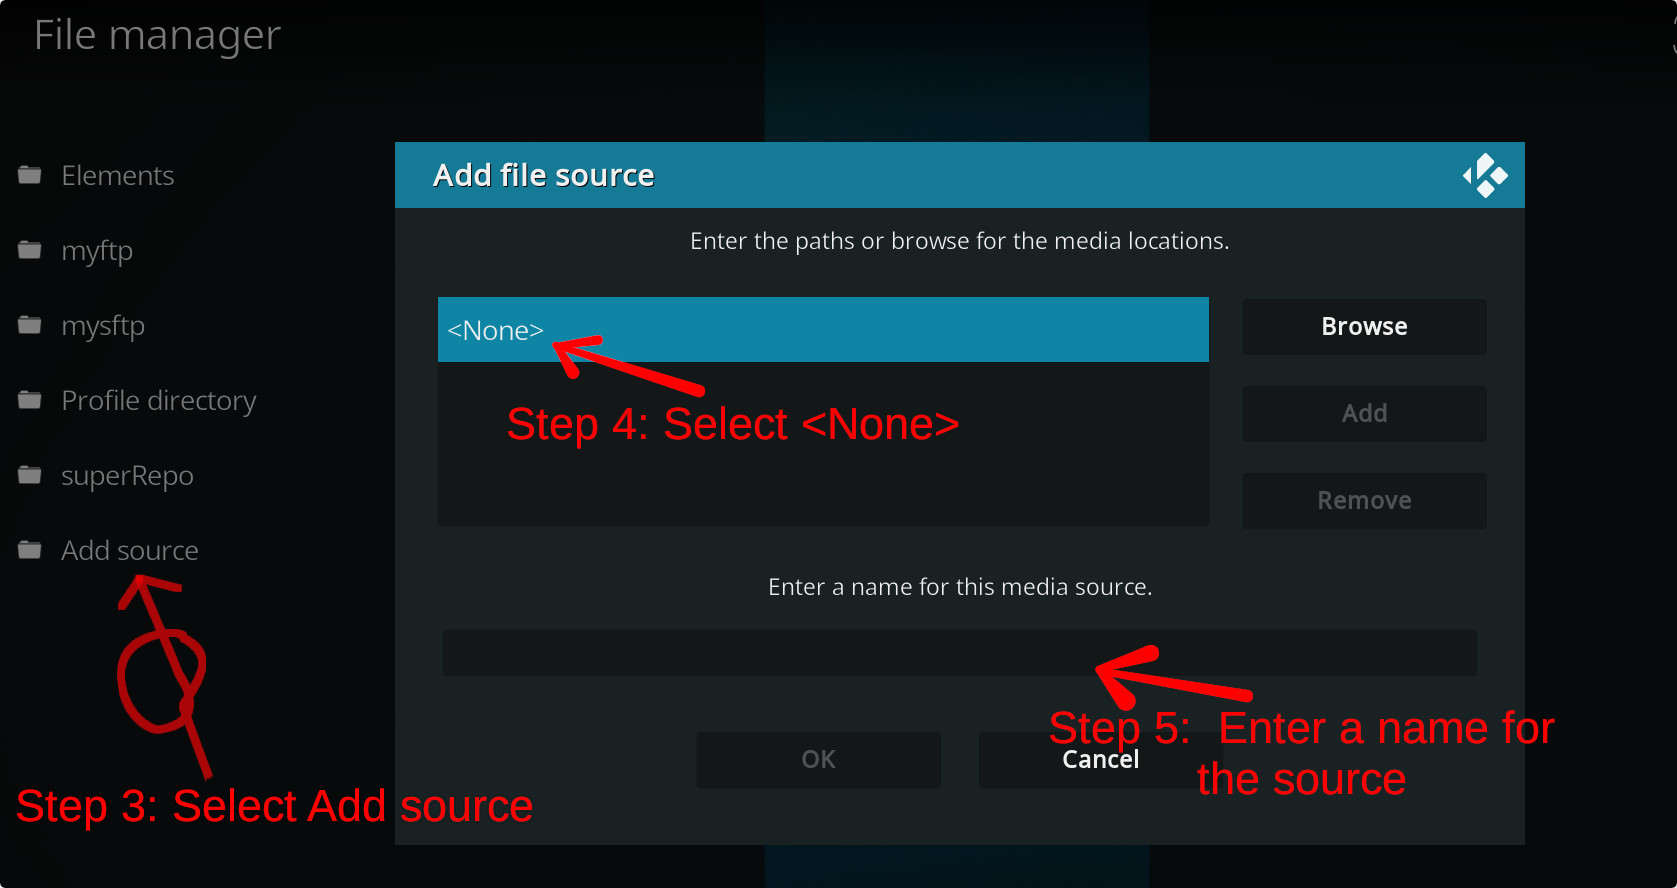
Via Directory
- First make sure you have the repository installed
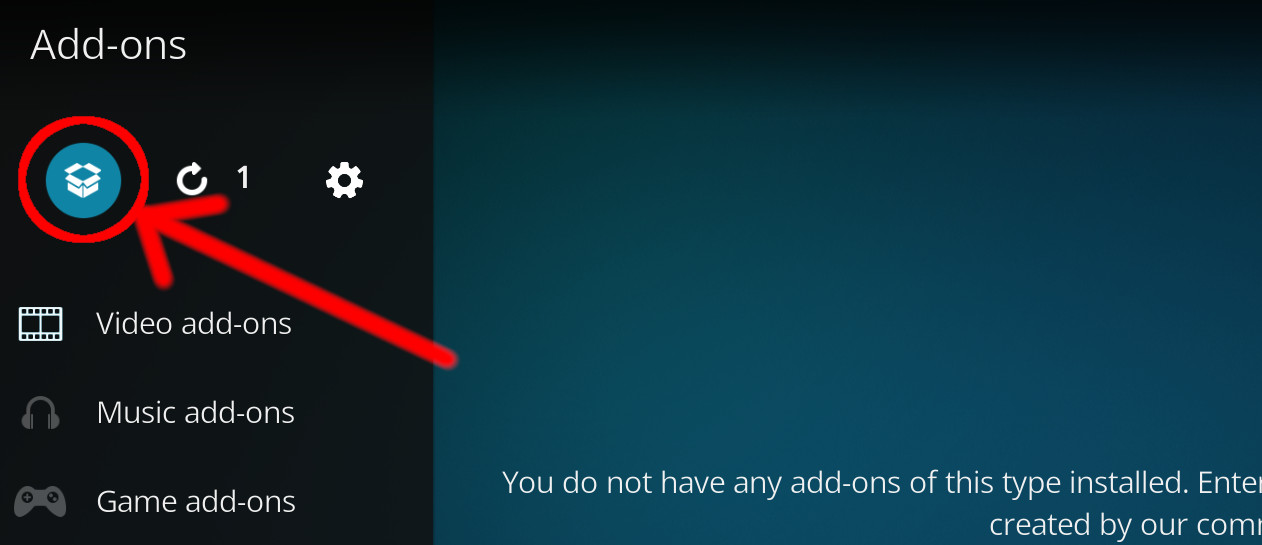
- Open up Kodi and navigate into Add-ons.

- Click the open box icon (above the side-menu).
- Select Install from repository.
- If you have at least one repository (besides the default) installed:
Select the repository you wish to install from.
- If you have at least one repository (besides the default) installed:
- Select the category the addon belongs to, in this case it should be skin.
- Select CDTV ENVISION LEIA 2.1.
- Click Install.
For a full installation guide please click here.
Additional Information
| Updated: | January 13, 2021 |
In Repositories: | |
| Platform: | all |
| License: | Not specified |
Depends On: |