Unlock geo-blocked content! and stay safe & annonymus online.
Some content on the Internet is blocked depending on your location. If you want to unblock content while staying safe & annonymus online - simply, install a VPN and get ready to access content you have been barred from thus far.
Download NordVPNFeatherence Skin
Description
Features: - 4 2D buttons effects: Bevel, Shadow, Overlay and Stroke effects are available across the entire skin. - 8 Layouts: Panel/2/3, Horizontal/2/3, Vertical RTL/LTR. - 6 Buttons shapes: Rectangles, Rectangles R10, Pillows, Hexagons, Circles, Triangles. - 7 Views: Center List, Line, Poster, Small List, Side List, Side Wall and Wall. Most views have about 10 different settings to fit your preference. - 11 AutoView setup: Movies, TV shows, Seasons, Episodes, Movies Sets, Actors, Genres, Years, Countries, Studios and Directors. - 1:1 realtime home design capability. Customized is at the top level, superb easy and fun! - Build creator: Allow to create your own build in a very unique way. Also used to save and load previously backups. - Coloring: Everything can be colored exactly as you want, preview is included. - DVD Cases: Support display of DVD cases and discs across the skin. - ExtendedInfo support (Movies/TV/Seasons/Episodes/Actors/Directors/AutoComplete..) - Fanart: Over 10 properties for fanarts! Including 2 layers of colors and textures. - Integrated video screen and OSD: Keep watching your video while navigating on any window/view, Video player OSD included! - Genres: 74 hard coded Genres images are insuring to always be seen in your prefered language. - Mouse: Full mouse support across the skin. - Multi Languages: Default buttons's labels may change to your current system language if you require. That's feature will work too when loading a shared build. - Overlay: Up to 10 different values of overlay for any buttons/menus, preview is included. - Reposition: Movement of objects maybe done automatic, aka RTL and LTR - simply depend on system language. Movment of home buttons in the skin design window are matching the current layout 1:1. - Subtitles: The subtitles window display current and previously choosen subtitles, include a Smart Search button and even auto switch between hosts if required. Subtitle OSD show country language flag and can be used to offset subtitle. - Touce Devices: Full support across the skin. - Trailers buttons in click: Can be activated using mouse/touch from the widgets and any of the skin views. - User customized media: Choose your favourite startup music, video and pictures slideshow music. - Password Lock: Lock your prefered buttons with a password. - Web browser: Launch your default OS internet browser from within Kodi. - Widget: unwatched/recently added movies and inprogress/recently added TV shows (10/15/20 etc). Additionaly support: Play trailer or up to 20 random trailers, manual/auto refresh, random fanart from widgets.. - Customized Widget: Create up to 10 widgets for each button.
How To Install
Direct installation
Via Repository
Via Directory
- Download the addon.
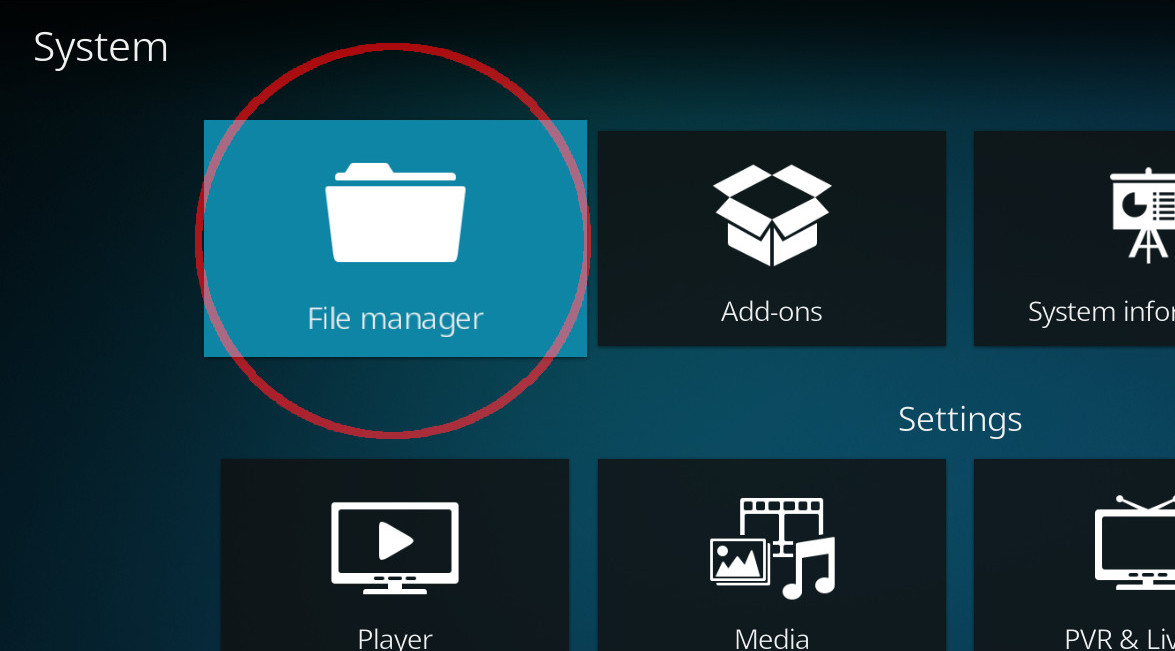
- Open up Kodi and navigate into Add-ons.

- Click the open box icon (above the side-menu).
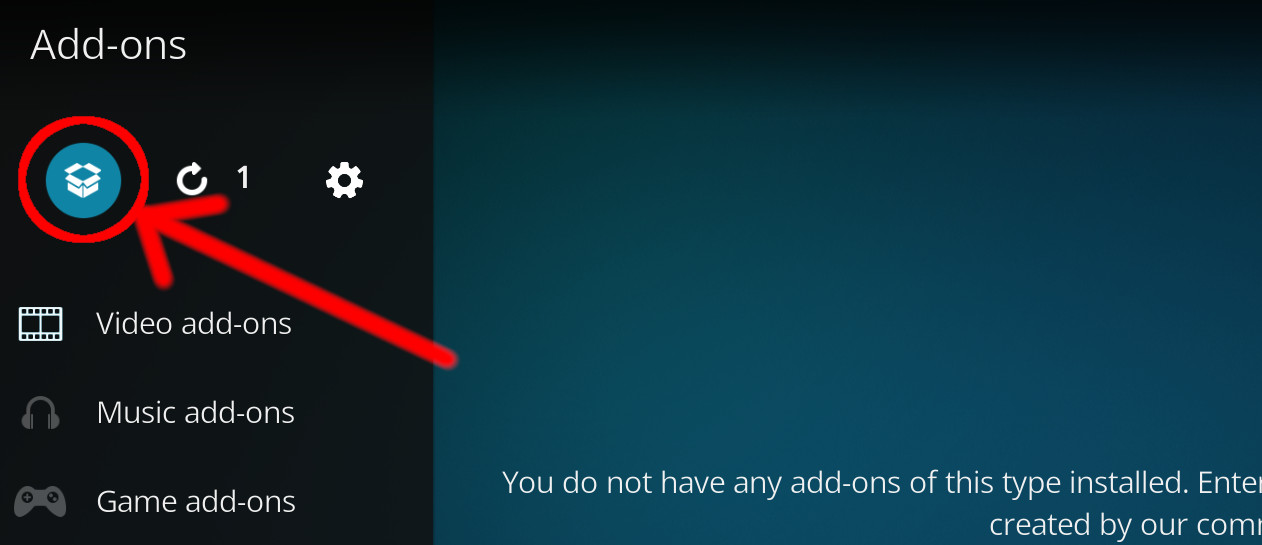
- Select Install from zip file.
- If this is the first addon you install, Kodi will warn you about installing addons from "unknown sources" for security reasons - it's your call.
- In any case, Kodi will warn you, you may not get auto-updates for this addon.
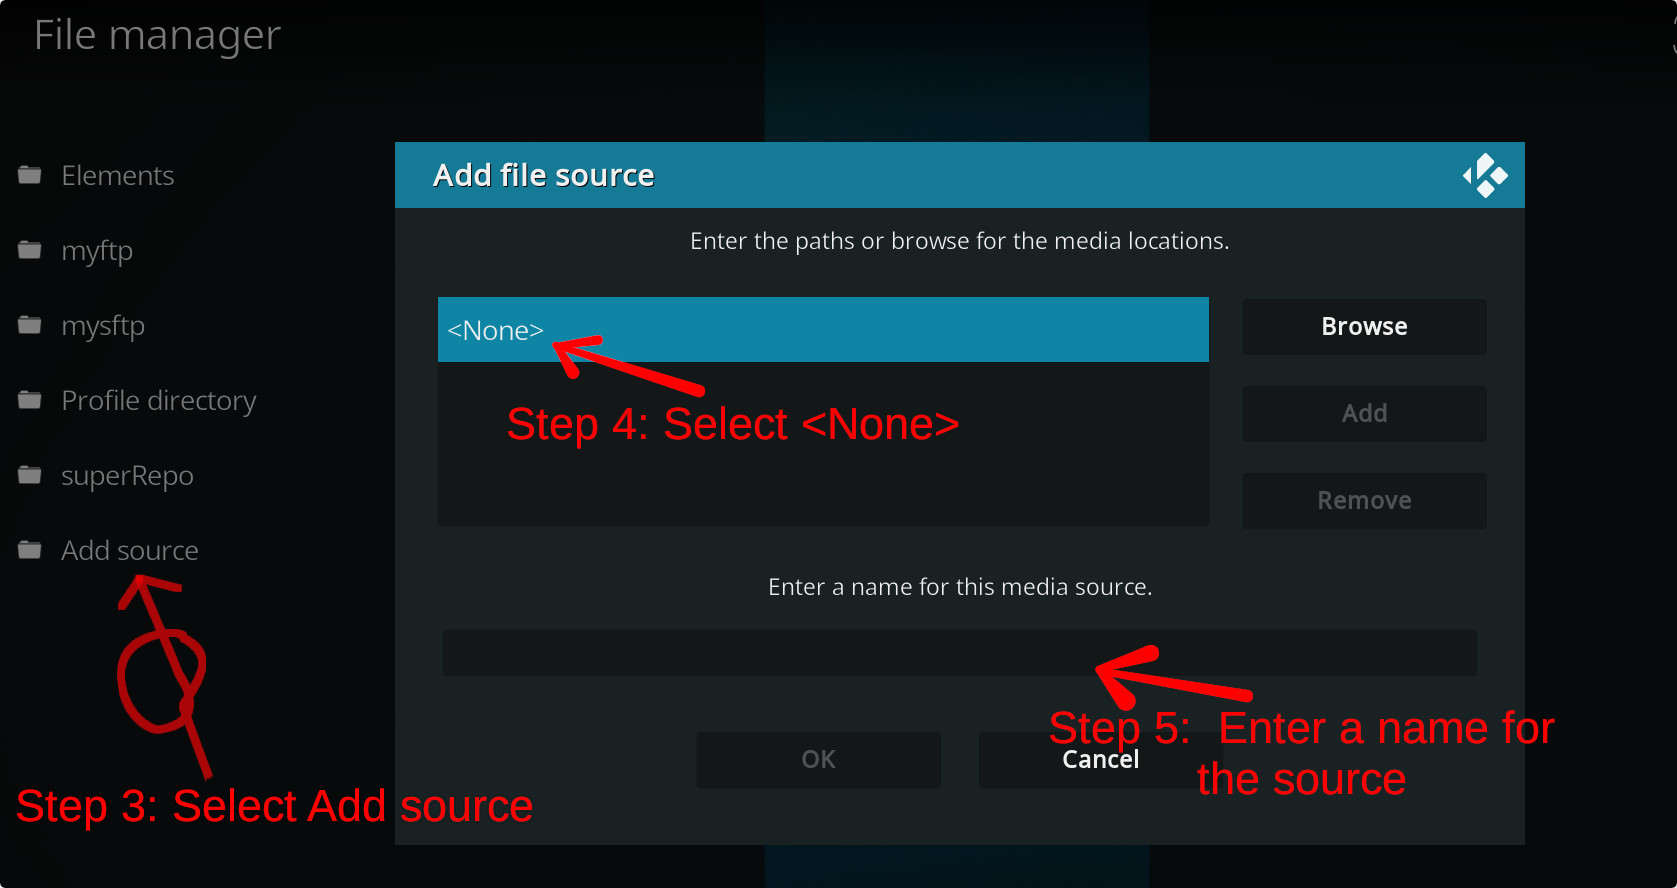
- Navigate into the location where you've downloaded the addon to and select it to Install.
For a full installation guide please click here.
Additional Information
| Updated: | March 22, 2021 |
In Repositories: |
|
| Platform: | all |
Alternative Sources: | Download 1Download 2 |
| License: | Not specified |
Depends On: |