
Protect your Privacy! use a VPN to download & surf annonymusly.
Identifying data, such as your IP: 216.73.217.113, is visible when you surf the Net. When using a VPN, your data is being switched by that of the VPN and not even your ISP can tell where you surfed.
Better safe than sorry...


TetradUI is a skin add-on for Kodi media center
Description
TetradUI is a skin add-on for Kodi media center. The aim with TetradUI is to create a fresh modern homage of the classic blades-style UI found in the original Xbox360 dashboard. Also seen in the works of Team Blackbolt and Jezz_X with projects MC360 and JX720 respectively. TetradUI is based on JX720 by Jezz_X. This add-on was created by Jezz_X and TeamUI.
News
2.0.0 - Add show/hide password to keyboard dialog - Use infill=false on transparent textures - Add Player.Cuts to video OSD - Add Favourites browser support - Add support for Dolby Vision, HDR10 and HLG codec flagging - Update screen calibration window - Update home submenu icons - Add support for color button - Add color picker dialog - Add game controllers port dialog - Add support for RetroPlayer savestate manager - Add scene markers to video OSD - PVR channel manager dialog will fade inactive channels
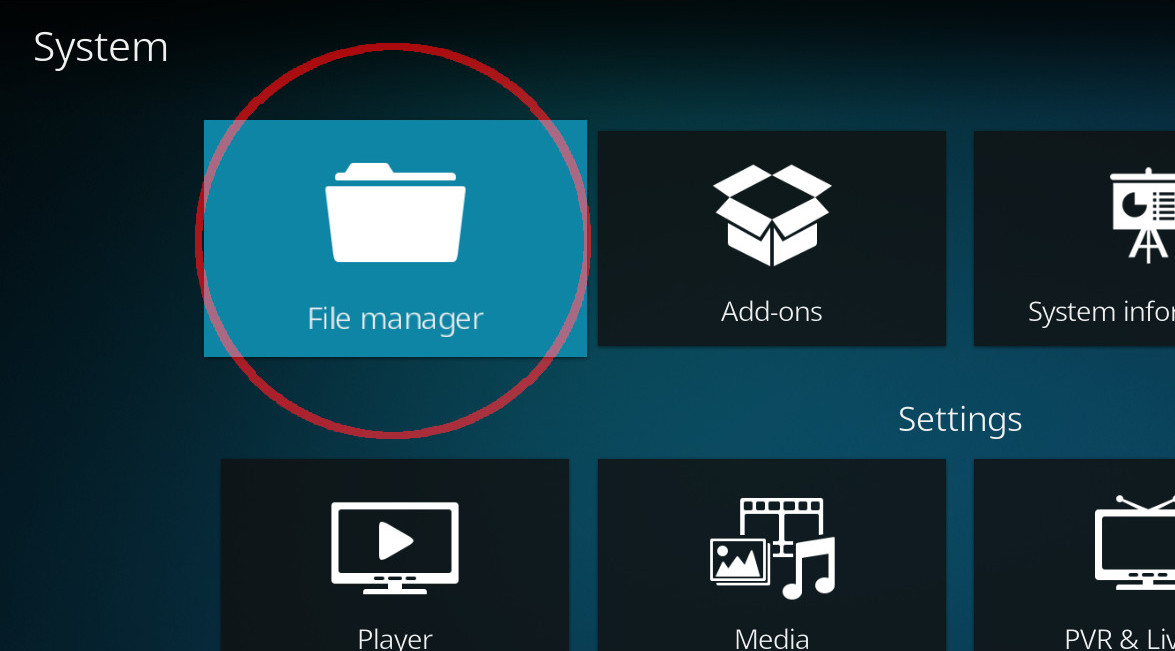
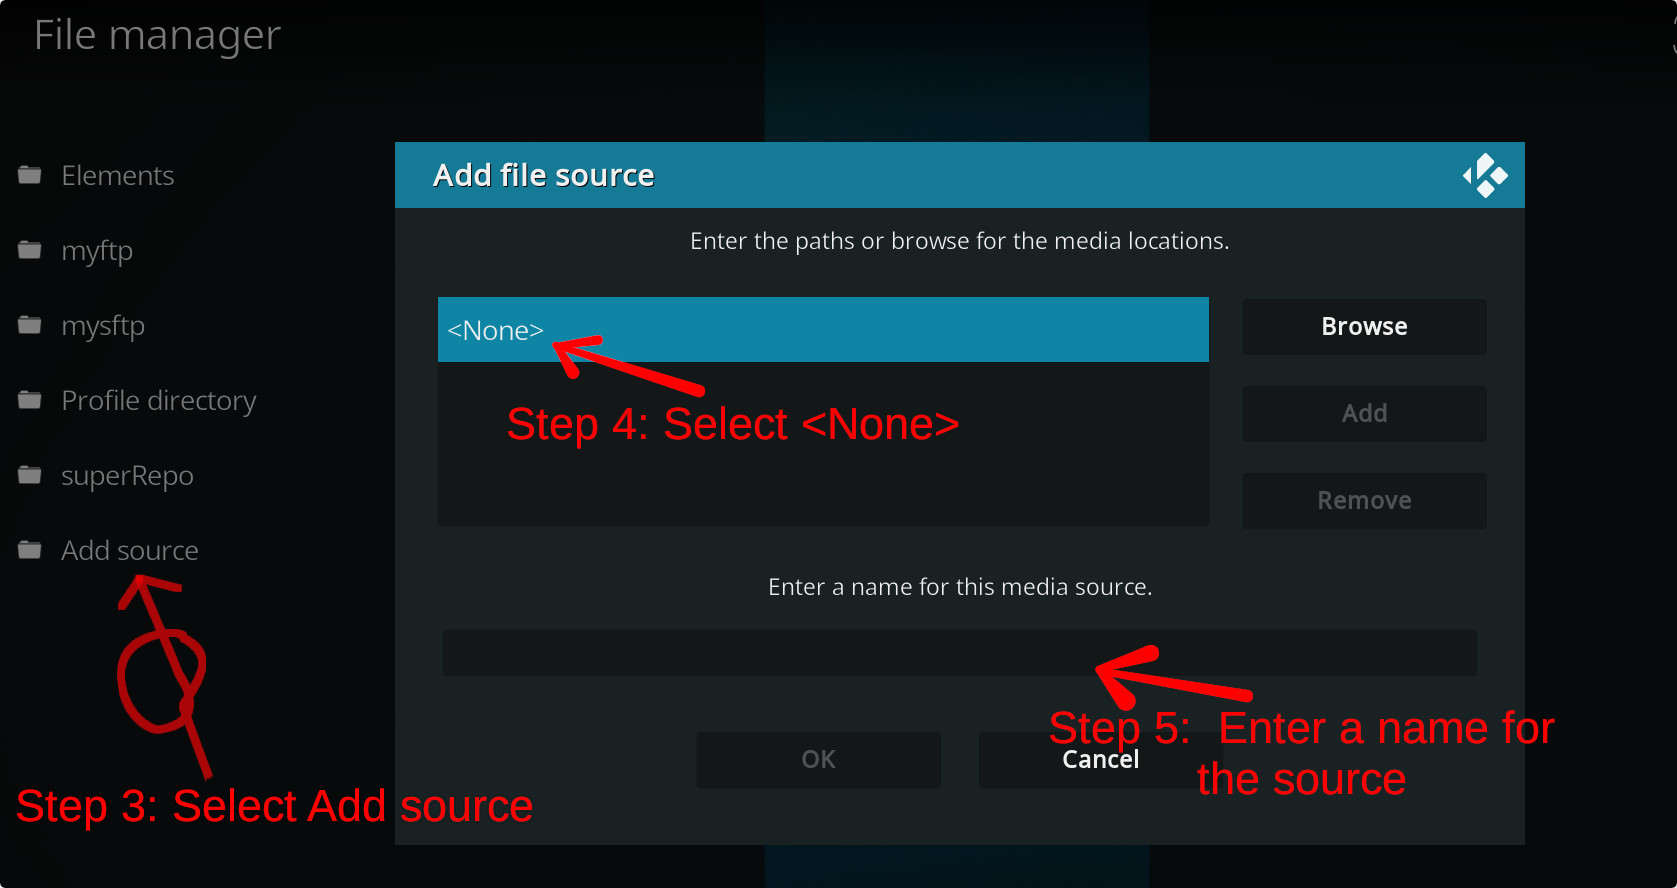
How To Install
Direct installation
Via Repository
Via Directory
- Download the addon.
- Open up Kodi and navigate into Add-ons.

- Click the open box icon (above the side-menu).
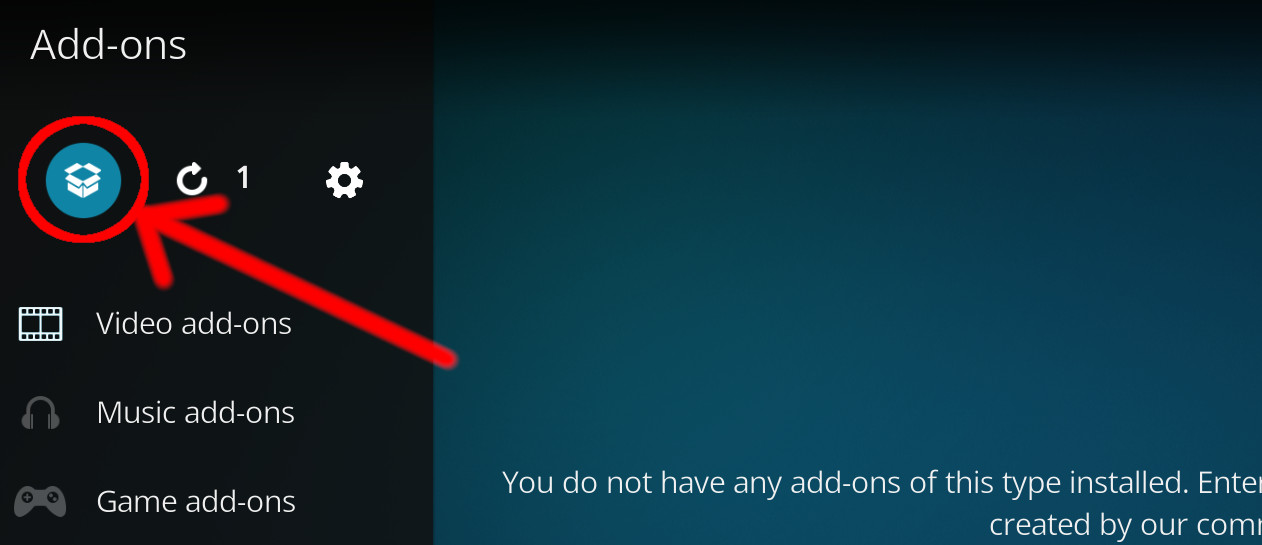
- Select Install from zip file.
- If this is the first addon you install, Kodi will warn you about installing addons from "unknown sources" for security reasons - it's your call.
- In any case, Kodi will warn you, you may not get auto-updates for this addon.
- Navigate into the location where you've downloaded the addon to and select it to Install.
For a full installation guide please click here.
Additional Information
| Updated: | March 17, 2023 |
In Repositories: |
|
| Platform: | all |
| License: | Creative Commons Attribution-Share Alike 3.0 United States |
Depends On: |