Unlock geo-blocked content! and stay safe & annonymus online.
Some content on the Internet is blocked depending on your location. If you want to unblock content while staying safe & annonymus online - simply, install a VPN and get ready to access content you have been barred from thus far.
Download NordVPNA bundle of system tools and programs
Description
This bundle currently includes autossh, diffutils, dtach, efibootmgr, evtest, fdupes, file, getscancodes, hddtemp, hd-idle, hid_mapper, i2c-tools, inotify-tools, jq, lm_sensors, lshw, mc, mrxvt, mtpfs, nmon, p7zip, patch, pv, screen, strace, unrar and usb-modeswitch.
News
107 - added dstat, htop and vim - updated difftools to 3.6 - updated dtach to 0.9 - updated fdupes to 1.6.1 - updated file to 5.31 - updated hd-idle to 1.05 - updated hddtemp to 0.3-beta16 - updated hid_mapper to 2.1.0 - updated libmtp to 1.1.13 - updated lm_sensors to 0d5ccf6 - updated lshw to 2.18 - updated mc to 4.8.19 - updated mtpfs to fd3864d - updated p7zip to 16.02 - updated strace to 4.17 - updated unrar to 5.5.5 106 - updated screen, fix colors issue 104 - updated file package 103 - added nmon 102 - added inotify-tools, mc 101 - mrxvt can be started from KODI - correct mrxvt terminal type - make hddtemp work 100 - Initial Release
How To Install
Direct installation
Via Repository
Via Directory
- Download the addon.
- Open up Kodi and navigate into Add-ons.

- Click the open box icon (above the side-menu).
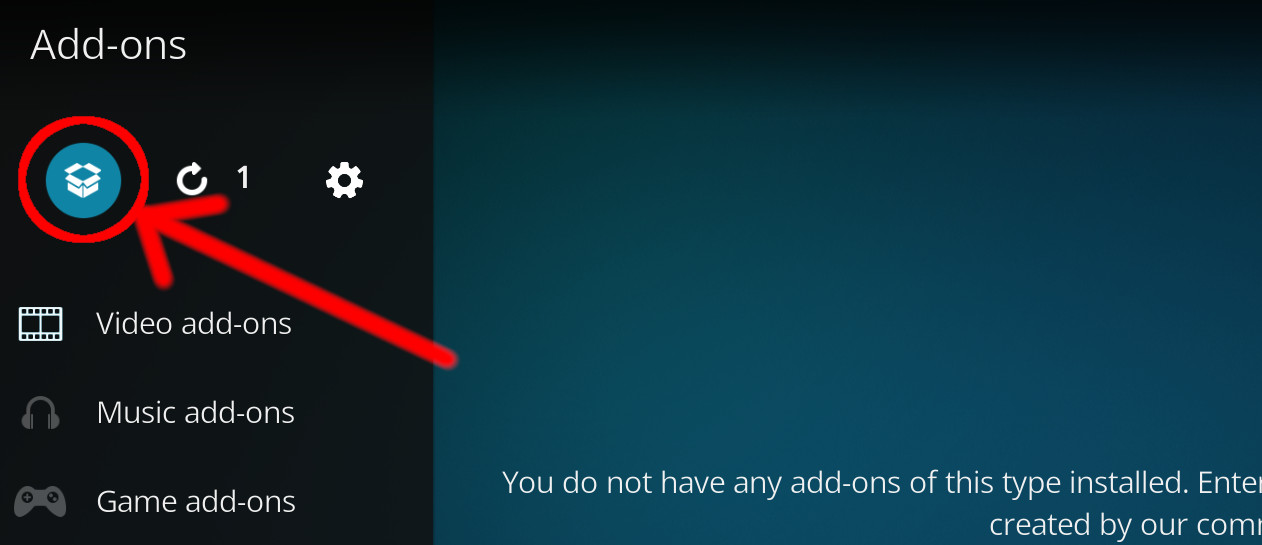
- Select Install from zip file.
- If this is the first addon you install, Kodi will warn you about installing addons from "unknown sources" for security reasons - it's your call.
- In any case, Kodi will warn you, you may not get auto-updates for this addon.
- Navigate into the location where you've downloaded the addon to and select it to Install.
For a full installation guide please click here.
Additional Information
| Updated: | January 14, 2021 |
In Repositories: |
|
| Platform: | all |
| License: | Not specified |
Depends On: |