Help other people decide, vote up or down?
Extended version of the TIDAL music add-on
Disclaimer
This is an unofficial client and is not supported nor endorsed by TIDAL.
Description
Play music and video from TIDAL music streaming service.
Requires subscription. Visit tidal.com for details.
News
v2.1.4 (2023-10-23)
- Added "My Profile" to the "My Music" page to show the own user profile
- Moved followers and following users to the User Profile page
- Added the new TIDAL feature "My Picks" to the User Profile page:
- There are four kind of picks: "My favorite track", "My major mood booster", "My go-to artist right now" and "My top album recently"
- You can play the tracks and open the album and artist page from there
- You can add and remove this items using the context menu
- If you go to the user profile page of a different user, you will see his/her Picks
View More ↓
How To Install
Direct installation
Via Repository
Via Directory
- Download the addon.
- Open up Kodi and navigate into Add-ons.

- Click the open box icon (above the side-menu).
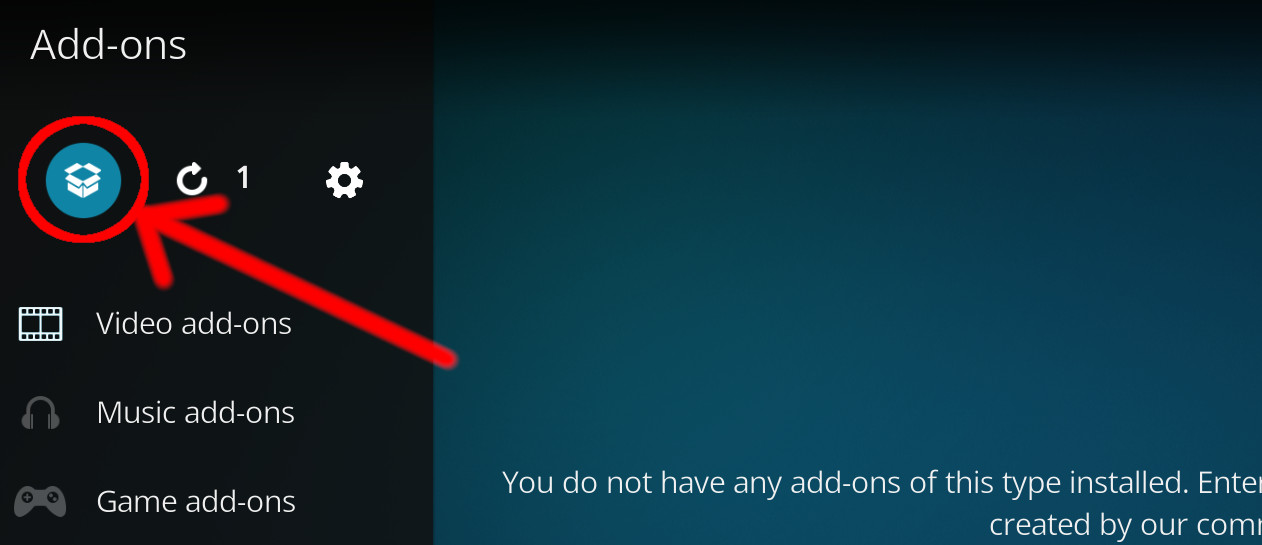
- Select Install from zip file.
- If this is the first addon you install, Kodi will warn you about installing addons from "unknown sources" for security reasons - it's your call.
- In any case, Kodi will warn you, you may not get auto-updates for this addon.
- Navigate into the location where you've downloaded the addon to and select it to Install.
- First make sure you have the repository installed
- Open up Kodi and navigate into Add-ons.
- Click the open box icon (above the side-menu).
- Select Install from repository.
- If you have at least one repository (besides the default) installed:
Select the repository you wish to install from.
- Select the category the addon belongs to, in this case it should be audio.
- Select TIDAL2.
- Click Install.
Installing via directory means you connect to a Web server directly using Kodi.
It also means that the addon is found under a repositry or a sub-repository you install from that directory (check out which repositories host
TIDAL2 addon
below).
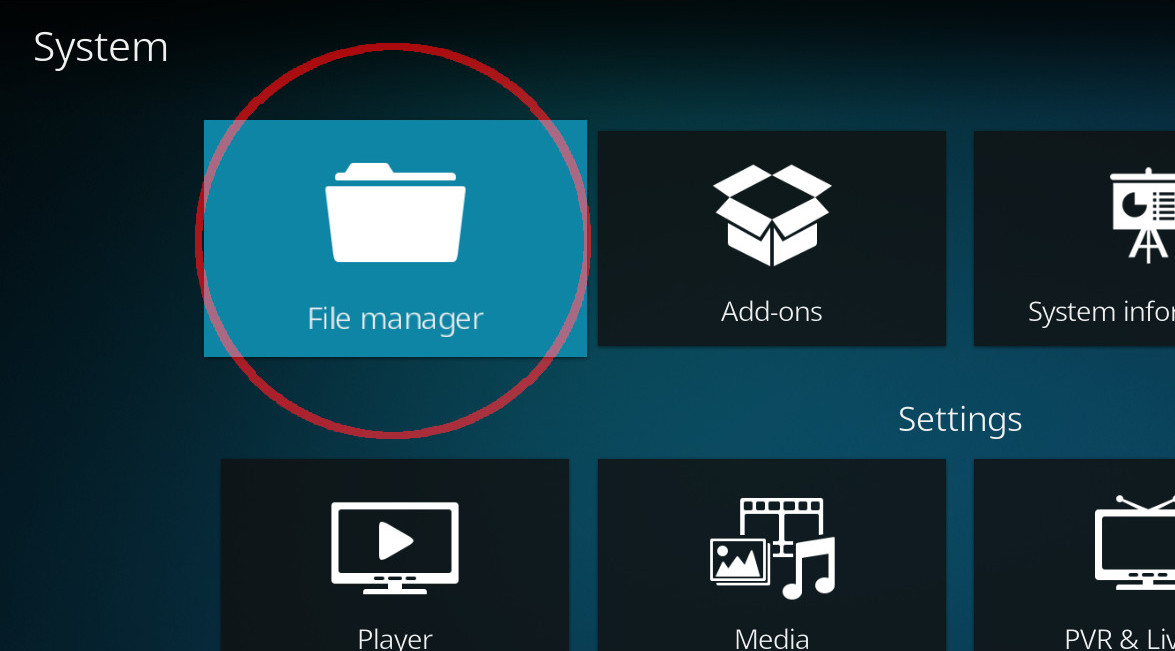
- Open up Kodi and navigate into the System settings screen by selecting the cogwheel button (above the side-menu inside Kodi's home-screen).
- Select File manager.
- Select Add source from the left pane (the right pane is in case you want to move files from one folder to another, if you're using a mouse you may need to double click it).
- Click the line where it says <None> and enter the following url:
https://mrgsi.github.io/gsource/
Note: some servers may be case-sensitive.
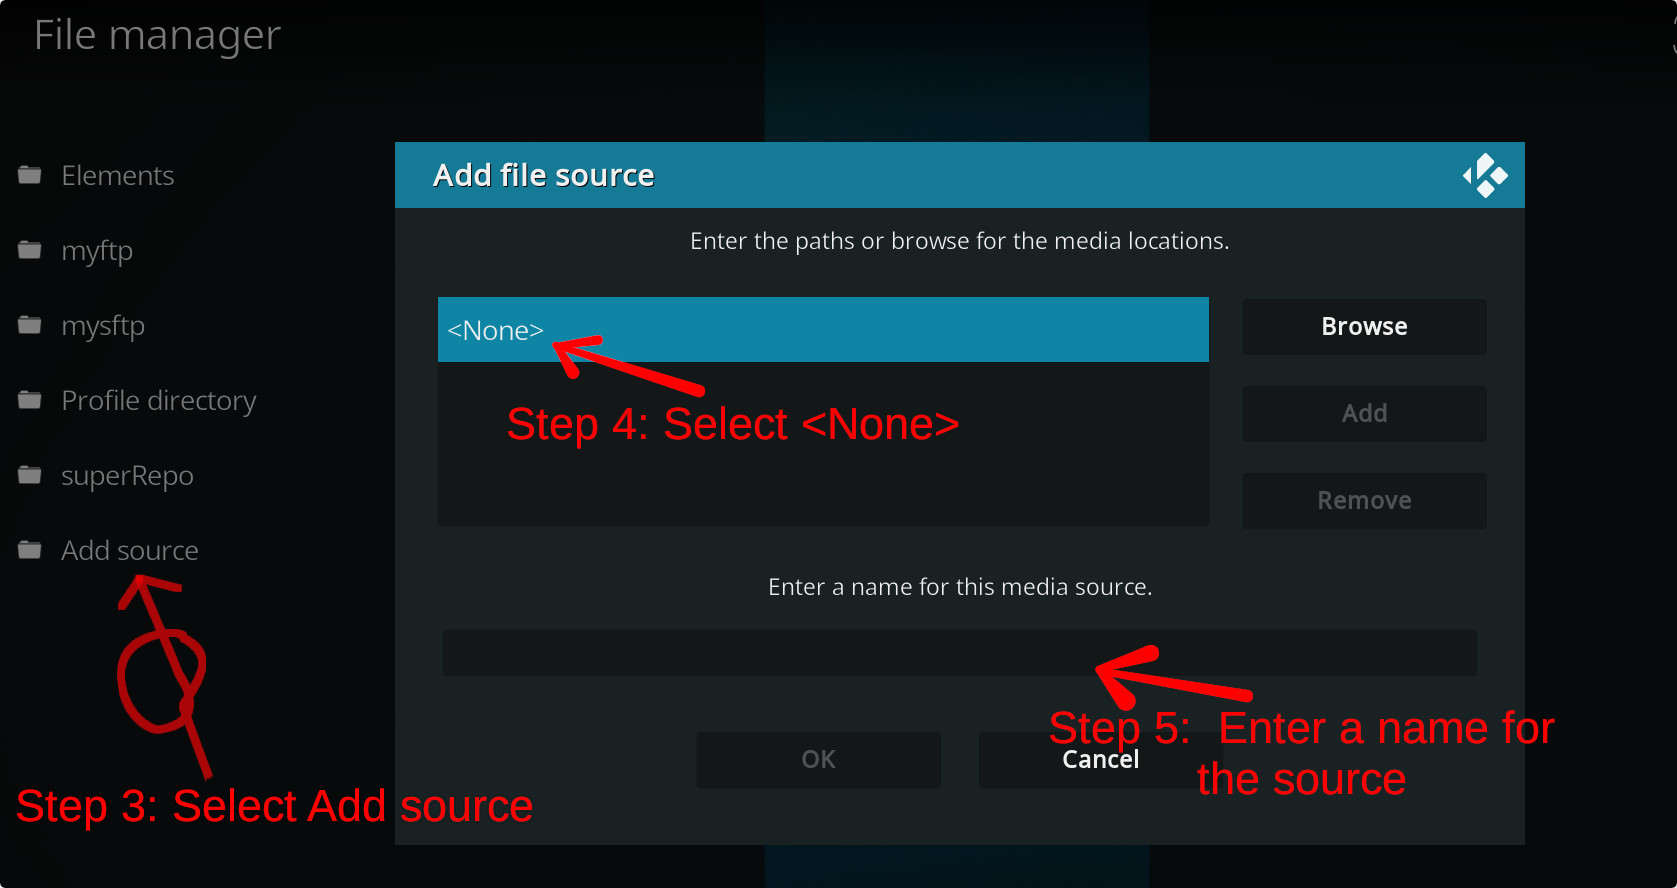
click OK after you are done typing. - Below that, if there isn't already, enter a name for the source which will be easy for you to recognize in the future. Click OK
- Now press the return button twice to return to home-screen.
Navigate into Add-ons.
- Click the open box icon (above the side-menu).
- Select Install from zip file.
- If this is the first addon you install, Kodi will warn you about installing addons from "unknown sources" for security reasons - it's your call.
- In any case, Kodi will warn you, you may not get auto-updates for this addon.
- Look for the name of the source as it was entered in step 5, select the repository zip file you see inside it.
That's it. The rest of the instructions are as detailed in installing Via Repository, use the repository you've just installed.
For a full installation guide please click here.
Additional Information