SubLoader

SubLoader

Provider:DenimNani
Type:service
Version:0.1.7
Views:1497
Download
Help other people decide, vote up or down?
3

Automatic subtitles for your content

Description

Auto download the best subtitle automatically as soon you start the video.Special thanks to OpenSubtitles.org for providing a unique UA for Subloader.

News

G-Mod 11.23.2022G-Man made adjustments to the name and addon.xml file to display in Kodi's subtitles folder. 0.1.7 11.10.2022helviojr made a patch so the function videosource() returns the stream url if it is a .strm file. That way it can detect the addon used to open the file/url and can use the addons exclusions. 0.1.6 05.05.2021Bug fix on open subtitle dialog.0.1.5 21.02.2021Subloader now runs on KODI v19 (Special thanks to peno/64).Added python 3 compatibility.Some grammatical corrections (Special thanks to AlexNaga).0.1.4 23.07.2019Added Dutch language (Special thanks to Tinuz97).Clean up project files.

View More

How To Install

Direct installation

Via Repository

Via Directory

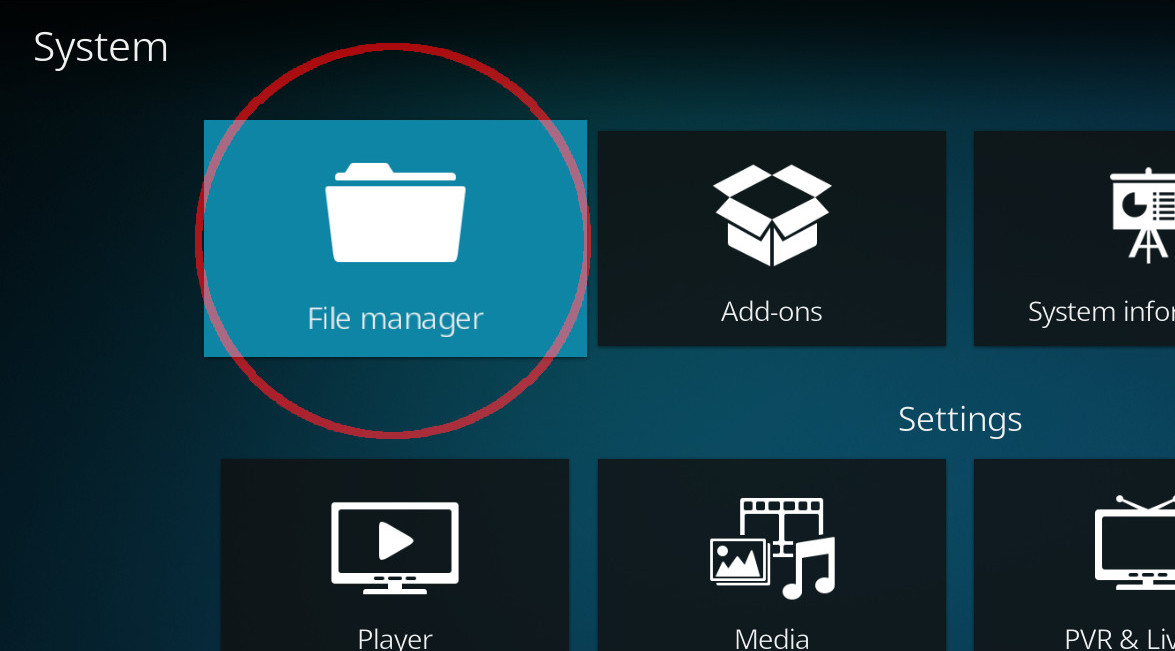
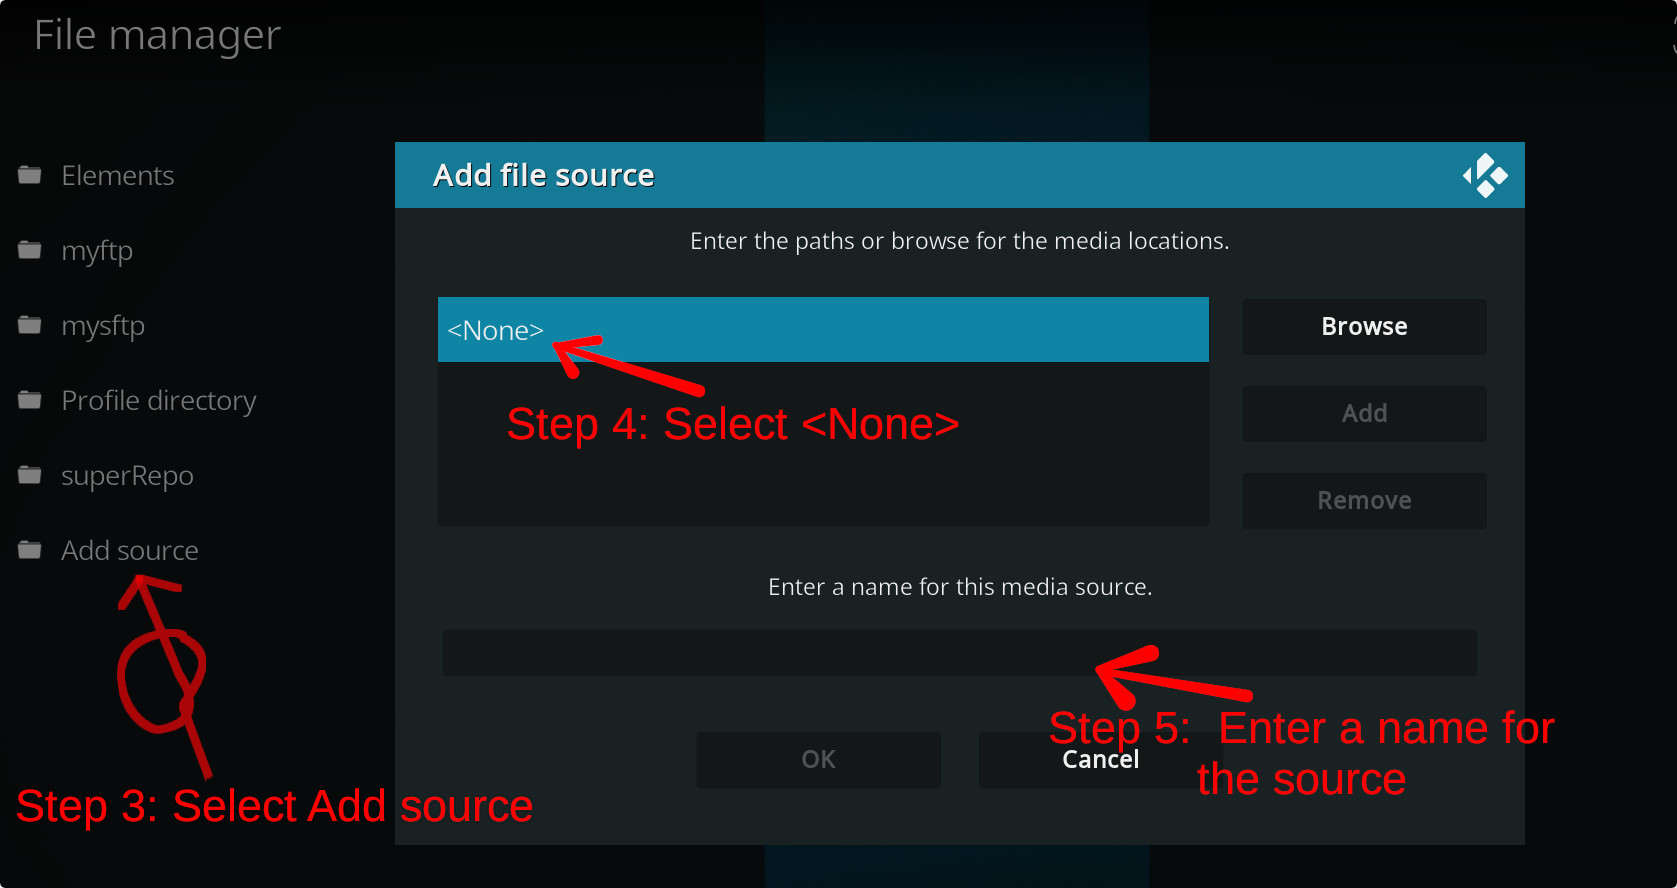
  1. First make sure you have the repository installed
  2. Open up Kodi and navigate into Add-ons.
    addon install - Add-ons
  3. Click the open box icon (above the side-menu).
    addon install - openbox
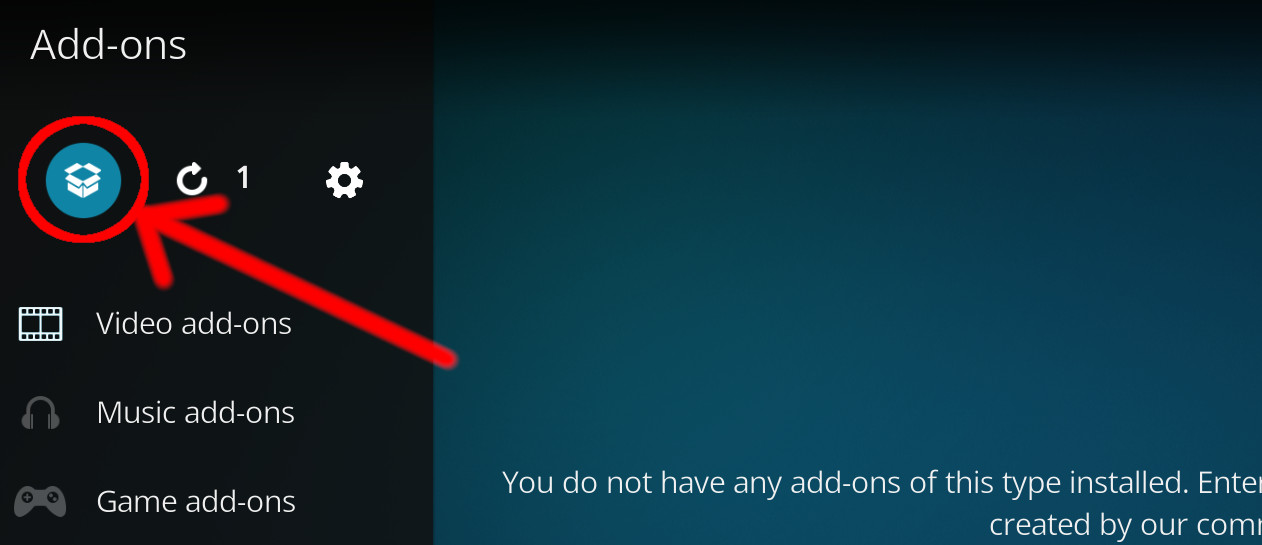
  4. Select Install from repository.
    • If you have at least one repository (besides the default) installed:
      Select the repository you wish to install from.
  5. Select the category the addon belongs to, in this case it should be service.
  6. Select SubLoader.
  7. Click Install.
Installing via directory means you connect to a Web server directly using Kodi.
It also means that the addon is found under a repositry or a sub-repository you install from that directory (check out which repositories host SubLoader addon below).
  1. Open up Kodi and navigate into the System settings screen by selecting the cogwheel button (above the side-menu inside Kodi's home-screen).
  2. Select File manager.
    addon install - Kodi file manager
  3. Select Add source from the left pane (the right pane is in case you want to move files from one folder to another, if you're using a mouse you may need to double click it).
  4. Click the line where it says <None> and enter the following url:
    https://mrgsi.github.io/gsource/
    Note: some servers may be case-sensitive.
    addon install - Add new source
    click OK after you are done typing.
  5. Below that, if there isn't already, enter a name for the source which will be easy for you to recognize in the future. Click OK
  6. Now press the return button twice to return to home-screen.
    Navigate into Add-ons.
    addon install - Add-ons
  7. Click the open box icon (above the side-menu).
    addon install - openbox
  8. Select Install from zip file.
    • If this is the first addon you install, Kodi will warn you about installing addons from "unknown sources" for security reasons - it's your call.
    • In any case, Kodi will warn you, you may not get auto-updates for this addon.
  9. Look for the name of the source as it was entered in step 5, select the repository zip file you see inside it.
    That's it. The rest of the instructions are as detailed in installing Via Repository, use the repository you've just installed.

For a full installation guide please click here.

Additional Information

Updated:October 24, 2022

In Repositories:

Platform:all
License:GPL

Recommended Addons

COMMENTS