Bypass geo-blocked content! and stay safe & annonymus online.
If you're blocked from viewing content based on your location, consider using a VPN to unblock it. A VPN is a service that switches your online identity with another one so that you appear online as if you're from another geographical location.
Check out NordVPN
Ease of access for Devs and Testers
Description
Provides ease of access tools for Devs and Testers
News
1.6.0 - Support plugins in repo subfolders - Fix choosing commit when only one branch exists - Cleanup orphaned files after update - Reload add-on localizations if changed during update1.5.5 - Add release automation via GitHub Actions1.5.4 - Fix error when "Install Dependencies" is disabled1.5.3 - Fix Web-PDB setting not being respected1.5.2 - Only read .json files for repo definitions - Fix already installed addons downloading icons again1.5.1 - Allow automatically adding Web-PDB to installed add-ons1.5.0 - Reorganization of most functions - Scannable QR code dialogs for GitHub authorization and uploaded logs - Limit on number of fetched commits - Add "Most Recently Used" sorting method for repos - Exclusions manager - Speed and performance increases1.4.3 - Add OpenDevTools as bundled repository1.4.2 - Add bare log uploading without authorization or issue1.4.1 - Fix skin installs - Use regional time formatting - Fix time formatting on Android (all platforms?)1.4.0 - Change format of raised issues - More comprehensive XML checking - More intelligent profile reloads - More intelligent enabling/disabling of updated add-ons - Fix clearing temp files - Show add-on type(s) before install - Show repository name as well as add-on name1.3.0 - Fix repo listings - Minimize profile reloads1.2.0 - List repos by user - Better enabling of addons after install - Fix timestamps with correct time zone1.1.0 - Add string localization - Add support for multiple repositories containing the same add-on - Offer to update add-on after adding1.0.3 - Better formatting for timestamps1.0.2 - Fix for existing folders1.0.1 - Some performance fixes1.0.0 - Initial Release
How To Install
Direct installation
Via Repository
Via Directory
- Download the addon.
- Open up Kodi and navigate into Add-ons.

- Click the open box icon (above the side-menu).
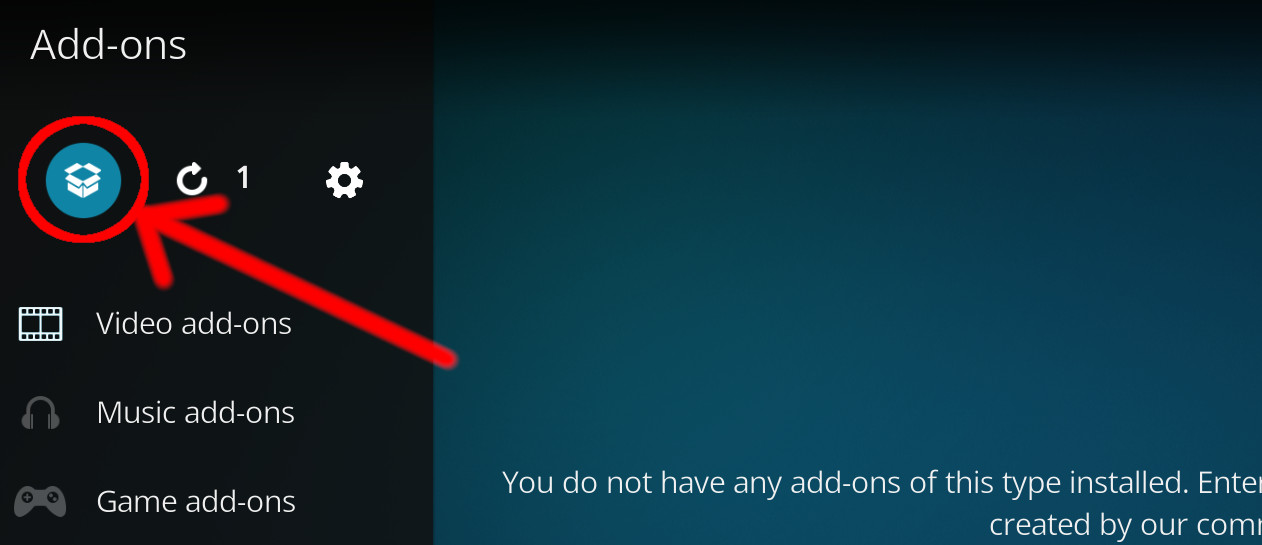
- Select Install from zip file.
- If this is the first addon you install, Kodi will warn you about installing addons from "unknown sources" for security reasons - it's your call.
- In any case, Kodi will warn you, you may not get auto-updates for this addon.
- Navigate into the location where you've downloaded the addon to and select it to Install.
For a full installation guide please click here.
Additional Information
| Updated: | January 01, 2023 |
In Repositories: |
|
| Platform: | all |
| License: | GNU GENERAL PUBLIC LICENSE Version 2, June 1991 |
Depends On: |