Unlock geo-blocked content! and stay safe & annonymus online.
Some content on the Internet is blocked depending on your location. If you want to unblock content while staying safe & annonymus online - simply, install a VPN and get ready to access content you have been barred from thus far.
Download NordVPN
Helper service for Kodi skins
Description
PVR artwork Configuration
News
v1.1.39 - clean trace of webservice v1.1.38 - removed webservice(removed dependency of module "script.module.cherrypy") v1.1.37 - fix for saveskinimage - Update listitem_monitor.py v1.1.36 - Hungarian lang created - remove get_repo_addoninfo - Fix for "Resume" in dialog v1.1.35 - fix setskinconstant v1.1.34 - fix correct skin settings - Fix for skinstring, selectimage, and overlayertexture - Fix for resourceaddons - Matrix Py3 changes v1.1.32 - fix for search dialog - add TMDB for TVShow - fix for webservice (now use just TMDB Art-Poster and fanart) v1.1.31 - fix urllib.parse vs urlparse in utils for Kodi 18 - add commits from Angelinas1 v1.1.30 - fix module import of context menu items v1.1.29 - compatibility change for CherryPy 17.4.2 and bump version requirement v1.1.28 - replace xbmc.LOGNOTICE with xbmc.LOGINFO as LOGNOTICE was removed v1.1.27 - Replace xbmc.translatePath with xbmcvfs.translatePath for Kodi 19 compat v1.1.26 - Remove python dependency for Kodi18/19 compatibility - minor fix v1.1.25 - Kodi 19/Python 3 compatibility - minor fixes
How To Install
Direct installation
Via Repository
Via Directory
- Download the addon.
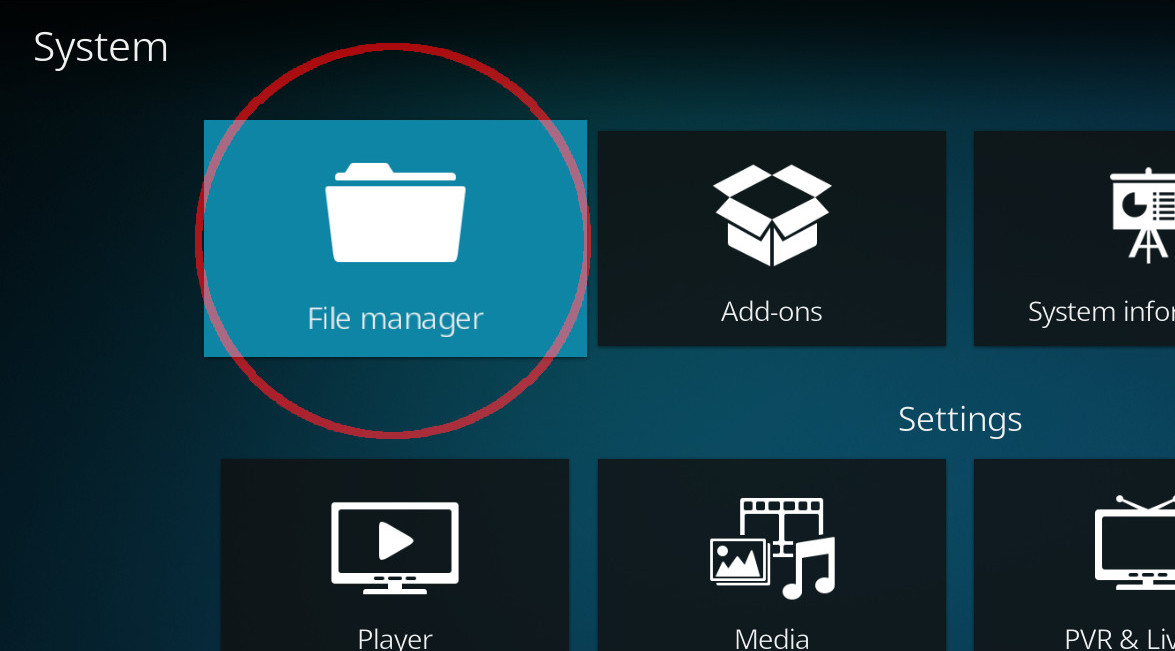
- Open up Kodi and navigate into Add-ons.

- Click the open box icon (above the side-menu).
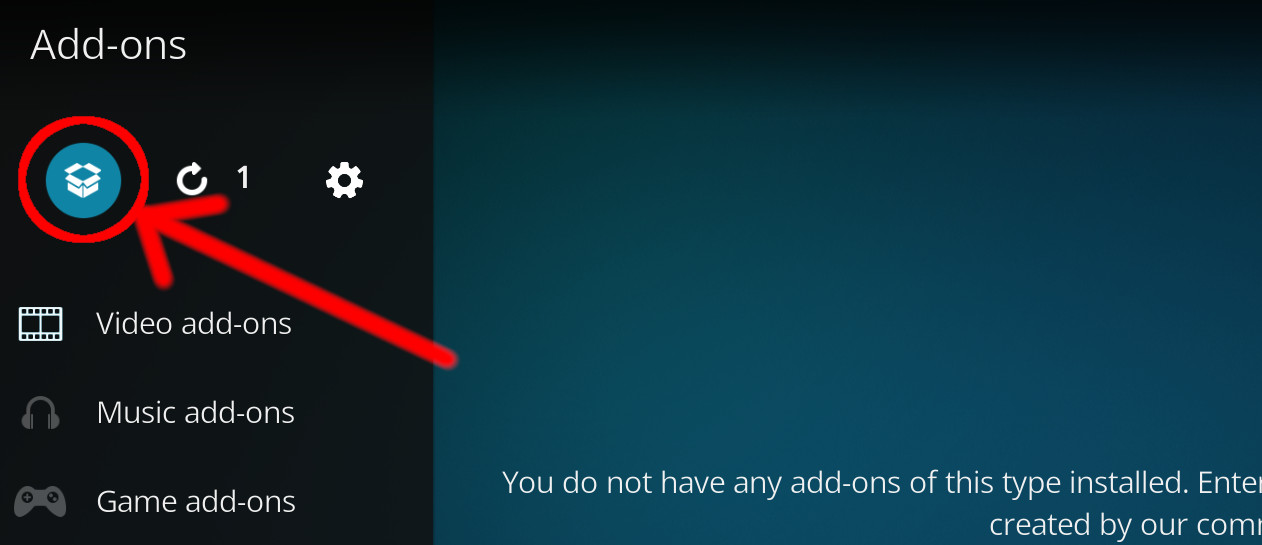
- Select Install from zip file.
- If this is the first addon you install, Kodi will warn you about installing addons from "unknown sources" for security reasons - it's your call.
- In any case, Kodi will warn you, you may not get auto-updates for this addon.
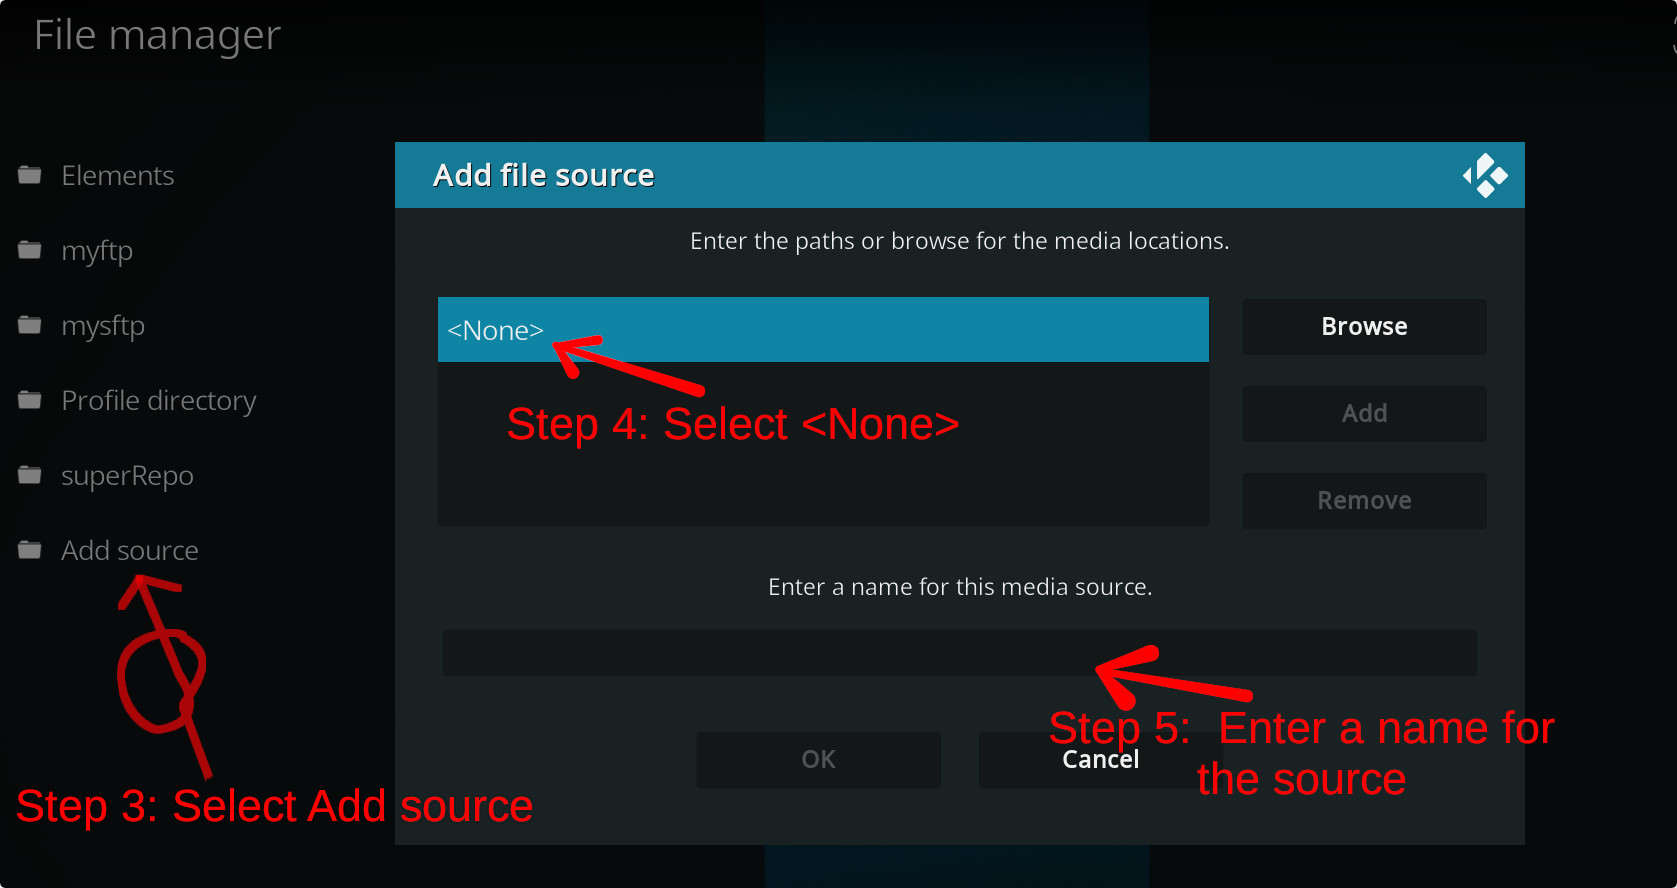
- Navigate into the location where you've downloaded the addon to and select it to Install.
For a full installation guide please click here.
Additional Information
| Updated: | May 07, 2023 |
In Repositories: | |
| Platform: | all |
Alternative Sources: | Download 1Download 2Download 3Download 4Download 5Download 6Download 7Download 8Download 9Download 10Download 11 |
| License: | GPL v2.0 |
Depends On: |