Unlike former Kodi version updates, the next version on the line is designated to bring a major overhaul to the UI (User Interface).
A new “skin” written from scratch will greet you by default once you’ll upgrade to the 17th version – which should be released any day now.
However, the change is not only cosmetic, as the term “skin” might suggest. Based on the current RC (Release Candidate) it is quite evident that you’ll have to familiarize yourself with Kodi’s new behavior in order to get around in it.
To mitigate your adaptation, here are a few tips to help you find your way around more easily.
On Krypton, It’s Now…
1. Right click means return / back
Previous Kodi versions used to have a “back” arrow button shown at the bottom corner area of the screen at all times except for when in home-screen.
However, the current Kodi interface does not include that button anymore, instead, when you want to go back to the previous screen, if using a mouse, you can simply point at a blank area of the screen and right click in order to go back.
Keyboard users or remote control can still use the “Backspace” or “Esc” keys in order to return.
2. Your installed Add-ons are inside “Add-ons”
In previous versions, when you wanted to go inside an add-on you’ve installed, you would normally go into the category of that add-on and then into add-ons, e.g. “VIDEOS” -> “Video add-ons”.
On Krypton this is no longer has to be the case, you may now simply have the selection marker standing above the Add-ons menu item and all your add-ons will become visible and horizontally scroll-able.
You can also click the Add-ons menu item in order to get an inclusive look, filtering add-ons by their category.
And lastly, the option to go inside “CATEGORY” -> “Category add-ons” still remains there in case you still prefer it over the others.
3. “Install from repository” / “Install from zip file”
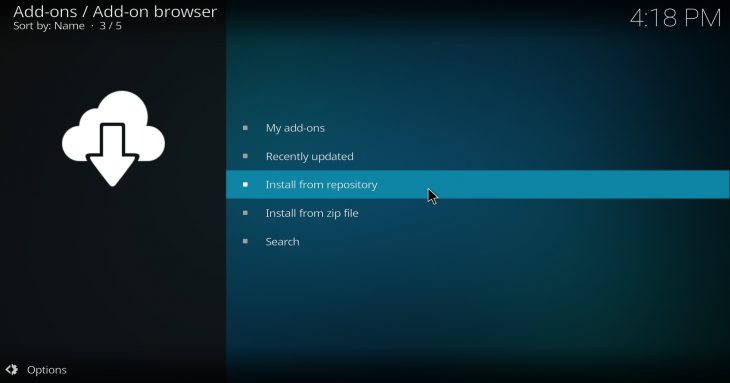
“Install from …” section can be now reached through clicking the open box icon inside Add-ons screen.
Previously, when navigating from the home-screen into “SYSTEM” -> “Add-ons” screen you could then find yourself facing a screen with options such as: “Install from zip file”, “Install from repository”, etc.
With Krypton things are a bit different, in order to navigate to a screen with these options you can go into “Add-ons” -> click the open box icon found above the menu and you’re there.
4. To “Install from zip file” you first need to enable “Unknown sources”
In order to be able to install an add-on from a zip file, you’re first required to enable installation from “Unknown sources” which serves as a layer of protection meant for people who are not sure about the outcome of their action so they could have another moment to consider their move.
Nonetheless, if you are certain regarding the outcome of your action, then by all means go ahead and enable that option.
You may navigate to the screen containing that option by clicking the “Settings” option when prompted upon trying to install a zip file.
Or, you may navigate there directly through clicking the cogwheel icon found inside the “Add-ons” screen just above the menu.
In fact, this is a shortcut that takes you straight into: “cogwheel” (home-screen) -> “System settings” -> “Add-ons” screen.
Just click on the “Unknown sources” line in order to enable it, you’ll see a warning prompt right after – read it carefully so you’ll be aware of the risks and if you accept then you’re good to go.


