Just last week we’ve exposed a hazardous phenomenon in which a Kodi addon might include a dependency/multiple-dependencies that may, if used by the wrong hands, in-effect spy after users.
Although it’s yet been widely spread throughout the Kodi community, it is nonetheless a good opportunity to make yourself acquainted with how you can take matters into your own hands and remove such invasive addon dependencies, shall the occasion require you doing so.
But before we’ll go over the necessary steps to remove a dependency, please note that the following is referring to addon dependencies which are superfluous and aren’t an integral part of an addon’s main functionality (otherwise it may render the addon unusable).
Kodi users who are here due to dependency issues while installing/updating addons, may find How To Fix Kodi Error: “Failed to install a dependency” more suitable to your needs.
Removing Kodi Addon Dependencies
1. Start by downloading the zip file of the addon you wish to remove a dependency from.
2. Extract the zip file contents into a folder and go inside it into the extracted addon’s main directory where you’ll see a file named addons.xml.
3. Open that file with a text editor (notepad for instance), and look inside it for a line which goes like this:
<import addon="[ADDON-TYPE.ADDON-NAME]" version="[VERSION-NUMBER]"/>
4. See if the addon name matches the dependency you wish to remove, and if it does – delete that line (from here: <import to here: /> including these parts).
Note: there might be multiple “import” lines, delete only the line that contains the addon name of the dependency you wish to remove (it should be inside a <requires>...</requires> clause – see image below for example).
5. Save the file and close it.
6. Now go outside the addon directory and use another program, such as WinZip, 7-Zip, etc, to compress the addon directory into a zip file.
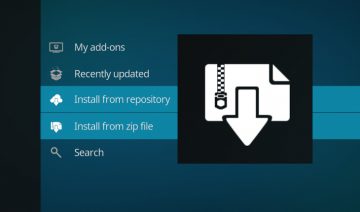
7. Install the addon: open up Kodi > select Add-ons (from the main menu) > click on the opened box icon to the top left of the menu and select Install from zip file. Navigate into the location where you saved the newly created zip file (the one containing the addon.xml file you’ve edited) > select it to install.
Example
To demonstrate how it’s done, I used Embuary skin addon which dependencies aren’t necessarily superfluous, rather, it was used to convey the point.
Initially, after downloading the skin’s zip file, I tried to install Embuary and got an error due to one of the dependencies could not be installed.

Kodi complains about a dependency that cannot be satisfied
I therefore extracted the zip file, entered it’s directory, and then opened the addon.xml file with a text editor.

Extracting the addon folder out from its zip file

Removing this line tells Kodi not to require this dependency
I then removed the line which contained the name of the dependency Kodi complained about earlier and saved the file.
Lastly, I compressed the directory back again to a zip file format, and installed it. This time Kodi was more willing to cooperate.

With the dependency removed, Kodi has managed install the addon
Once again, I’d like to stress that the example was given for demonstration purposes only. It’s not recommended to remove dependencies from Kodi addons due to installing/updating issues – for that purpose, you’d be much better off with the guide referenced above.