TVADDONS is one of the most venerable, if not the most venerable, 3rd-party, Kodi add-on exists today.
With time, this repository add-on not only gained well-deserved reputation but it also accumulated a huge collection of useful add-ons hard to find anywhere else.
As such, it’s not hard to imagine why TVADDONS was already featured on IWF1 in the past. Nevertheless, things changed a lot since then, for instance the new Kodi skin which changes how you install add-ons is one good enough reason to revisit the article.
But not only changes in Kodi or TVADDONS were the main motive for revisiting the article. This time around, I’ll share with you how to use TVADDONS (and Kodi in General) in a more performance-wise way so that you’ll keep your Kodi lean & mean for the future to come.
How To Install TVADDONS Repository
1. Open up Kodi and click the “cogwheel” icon representing the settings menu.
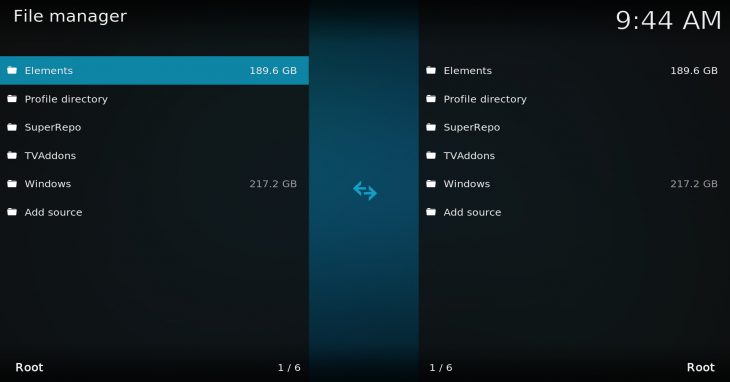
2. Select “File manager” from the items inside there. You’ll now see 2 lists of folders.
These lists contains: your home folder, additional local drives (drive C, drive D, etc…), external drives (USB flash drive for instance), some Kodi-relevant folders and non-local sources in case you’ve already installed ones.
The reason there are two of those is so that you could copy a file from one folder to another through Kodi’s interface, this is not the case this time, so simply stick to working with the list you’re on by default.
3. Go down to the last item of the list where it says “Add source” and open it.
Note: mouse users will have to double click to open it.
You’ll now see a new window titled “Edit file source”, click the line where it says “<None>” and use the now-opened on-screen keyboard to type the following Web address: http://fusion.tvaddons.co
Click “OK” to enter the address, now, below it, click the empty line just below where it says “Enter a name for this media source” -> enter a name that will be easy for you to remember. For instance, I named it ‘TVAddons’, then click “OK” and again “OK”.
If you’ve done everything correctly, you’ll now see the new source name you’ve just added in the File manager’s lists.
Unlike most other add-ons and repository add-ons out there, TVADDONS is rather unique in the sense that it’s not just a repository for add-ons but a repository for other repositories too, a meta-repository if you will.
As such, TVADDONS guys have developed a tool called Indigo which makes it easier on you to access, navigate and configure the way you interact with the meta-repository. In a later post, I’ll explain how to use Indigo more extensively, but for now, using TVADDONS in a performance-wise manner will do.
Update: What is Indigo Kodi Addon and How Do You Use it?
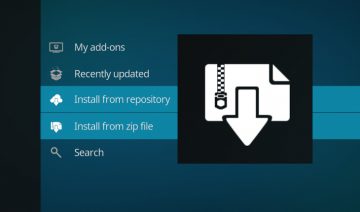
4. So, to make TVADDONS readily accessible for you, now that you’ve added it as a source, go back to the home-screen and from the main menu select “Add-ons” -> click the opened box above the menu and select “Install from zip file” option.
Look for the name you gave TVADDONS when you’ve added it as a source, click on it -> “begin-here” -> click the Indigo plugin zip file inside there and wait for the installation to finish. This may take a few minutes, depending on your Internet speed and other factors.
Once the add-on installed you’ll see a notification that it’s been successfully installed.
5. Go back to the main “Add-ons” screen. You’ll find Indigo under “Video add-ons” and “Program add-ons” categories. Select it from one of those categories to open it.
Upon doing so, Indigo will automatically add TVADDONS repository to your list of installed repositories which is what we actually want.
Go back and click the opened box from the main “Add-ons” menu once again, this time go into “Install from repository” select “TVADDONS.AG Add-on Repository”. You’ll see all the categories in which TVADDONS stores its add-ons. Feel free to explore them and install add-ons you like.
Lastly, as I’ve mentioned in the beginning, I’d like to share with you how to use TVADDONS (and Kodi in General) in a more performance-wise way. Experienced users could attest to the following and new users are recommended to follow this practice.
When you install add-ons on Kodi, each add-on has its own thing that it does, but besides that, each add-on also has its normal routine of checking for updates, storing cache files, etc…
The thing is, the more you add, the more encumbered your Kodi becomes. Sometimes, it may reach a point where your Kodi might take a few minutes to warm up or to shut down, which occasionally may not be that bad. Yet repeatedly however, it can become a real nuisance.
Moreover, not only the accumulation of add-ons can weigh down your Kodi, it may also happen due to misconfigured add-ons, or not so well coded ones.
The advice here is – try to keep your Kodi neat and tidy. If you’ve installed an add-on that you no longer intend to use, remove it then. If you’ve installed an add-on and later noted that your Kodi started to become sluggish, you might be better off with an alternate one or simply without it.
Obviously though, there’s no need to take it to the extreme, new versions of Kodi incorporated many performance improvements that will make your experience light and breezy, just try to keep the above in mind however, while playing with it :)


